Click to view our Accessibility Statement or contact us with accessibility-related questions98% would recommend to a friend 




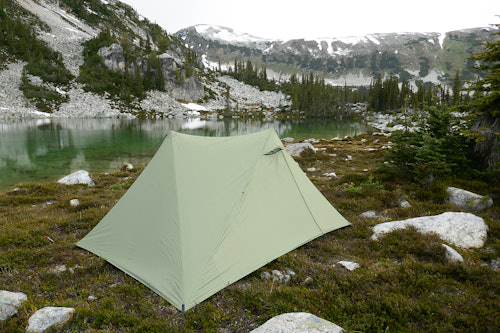
Drop + Dan Durston X-Mid 1P Tent
Drop + Dan Durston X-Mid 1P Tent
bookmark_border
Where's the price?
To negotiate the best possible price for our customers, we agree to hide prices prior to logging in.
4.2K requests
·
Free Returns in USA
Product Description
Designed to be the best double-wall solo shelter supported by trekking poles, the X-Mid is the brainchild of Dan Durston, an experienced thru-hiker and established member of the ultralight community. It aims to solve the common issues seen in trekking-pole-supported tents: Most are single-trekking-pole pyramids, which lack headroom, or overly complex multi-pole designs, which are tedious to pitch Read More
Customer Reviews
4.8
(271 reviews)
5star(224)
4star(38)
3star(5)
2star(4)
1star(0)
search
close
Images
keyboard_arrow_downSort by: Top Reviews
keyboard_arrow_downkincheng
48
Oct 23, 2019
Nice! Your designs are top quality and those other manufacturers will be following along soon enough. Btw, what is the max user height for the xmid 2p. My buddy is 6’6” and regardless I’m gonna try and shove him in there but I’d like to know how angry he will be.

dandurston
5116
Dan Durston
Oct 23, 2019
kinchengI say the 1P works pretty to about 6'2" (188cm) because some users are happy to about 6'4" (193cm) while others say 6'0" (183cm) is about the limit. The 2P is 5" / 13cm longer than the 1P but also has more inward slope so it actually sleeps about 3" / 8cm longer. So I think it works comfortably to about 6'5", with users likely reporting the max in the range of 6'3" - 6'8". So your friend will fill it up but he shouldn't be too upset.
bpchristensen
172
Apr 16, 2019
checkVerified Buyer
Hard not to give 5 stars simply for the innovative design and the passion and involvement of the designer. I do a lot of reviews on Amazon (last time I checked I was ranked #630 of all reviewers), and I usually use a 5 star rating for something that is absolutely perfect and cannot be improved upon. Honestly I’m not sure that is entirely the case with this tent, but I’m still going with a 5-star rating because I am genuinely very impressed with the overall functionality and quality of the tent.
It it is definitely trickier for me to pitch than Dan makes it look on the video. Because the fly is not square (due to the vestibules), getting perfect 90° angles at the corners takes a bit of fiddling. And without perfect 90° corners, the pitch won’t be quite right. This is especially true when pitching it on uneven terrain. I think the real secret is really pulling the corners taught before staking. In wet or soft ground, this will probably mean you'll need to upgrade from the tiny shepherds crook stakes to some "v-channel" type stakes.
One thing I notice is that the bathtub of the inner tends to pull up when the pitch is good and taught, even with the support straps loosened all the way. I haven’t slept in it yet, but I can see potential for some interference with the mesh while sleeping, which honestly doesn’t bother me. This problem largely disappears once your sleeping system is put in place and holding everything down. (the inner just "hangs" from the peak, and is stayed out on all 4 corners to the outer corners of the fly). Some color coding of one of the corners might be a good improvement, even though it is fairly obvious, but it might save some folks having to re-do connections.
The total outer area of the tent is quite large for a 1P tent and the vestibules are very generous. Literally big enough to put all your gear on one side and then cook dinner on the other side while it’s pouring rain outside. (You have to put your butt inside the inner and then cook between your legs, but it’s totally do-able.
There are a lot of other thoughtful touches and quality construction throughout. The corners are all beefy and well-stitched, the doors in the outer and inner all have tie-backs, there is a mesh pocket in the roof peak of the inner (big enough for airing out socks), and the line-locs on all the tie-downs is a really nice touch. I really like the self-sealing waterproof zippers on the outer - this eliminates the typical snagging (and leaking) you get from the typical "flap" that covers non waterproof zippers.
Overall I’m very impressed, and while it is a smaller sleeping area in the shoulder/head area than other traditional 1P tents I've used it is literally almost 1/2 the weight. And it will be much better in rough weather or creepy-crawlie prone areas than my normal ultra-light shelter - a single wall tarp + Tyvek ground sheet.
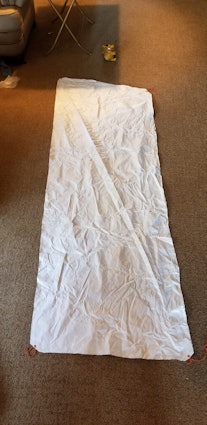
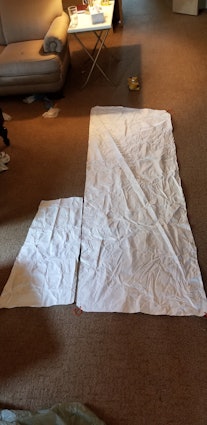
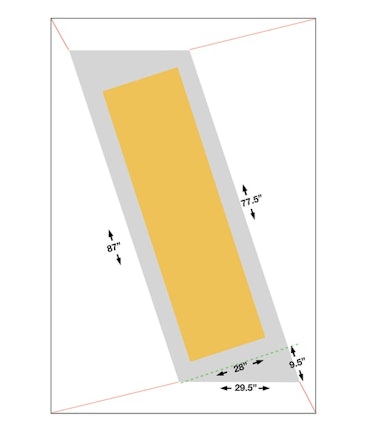
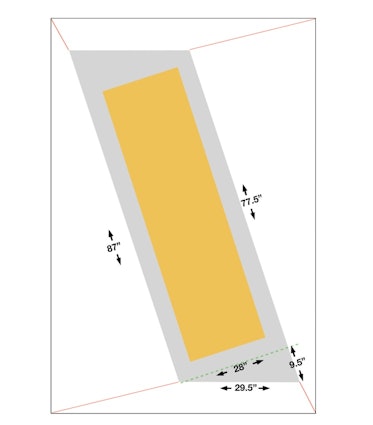
Speaking of ground sheets, I'm obsessive about caring for my gear, and so I usually always use a groundsheet to protect my precious tents from mud, squashed bugs, animal turd stains, and punctures from sticks and rocks (almost impossible to avoid in the places I camp). I have a roll of Tyvek, so in about 10 minutes I was able to roll out, measure, and cut a perfect footprint using Dan's dimensions:

(Edited)
Valgal
31
Sep 6, 2019
I believe you are supposed to make the footprint slightly smaller than the tent so that water isn't channeled between the footprint and the tent.
bpchristensen
172
Sep 11, 2019
ValgalRight. But we were talking about the “inner” whereas I think you’re referring to the outer fly. You’re absolutely right - you don’t want the ground sheet to extend beyond the fly for exactly the reason you’ve pointed out; rain will hit the ground sheet and flow under the tent.
(Edited)
Whiteburn
23
May 24, 2019
checkVerified Buyer
Having spent some times using the X-Mid I can only re-iterate others’ comments, a well designed shelter, very good build quality, roomy & easy to set up…..Excellent job Dan!
Would like to have given 5 Stars but in common with others’ I’ve found a few niggles (would give it 4.9 stars):
Firstly, the supplied cordage slips in the LL3’s in gusty winds & is cut too short to accommodate a bumpy pitch………easily rectified with longer 3mm braided polyprop.
Secondly, the carbide pole tips (BD Trail) exhibited a worrying ‘nipple’ in the fly fabric, I ended up stitching a small piece of Hyperlon type material over the eyelet which seems to have cured the ‘problem.
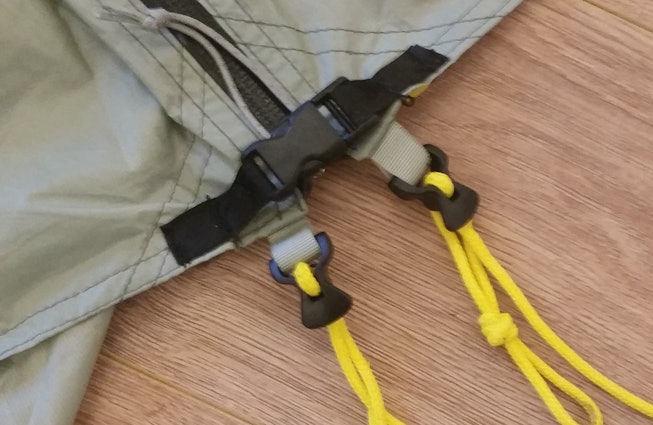
Third, the door zippers are under significant stress, I added a 12mm side lock across the zip which makes me a lot happier, guards again zipper failure & will definitely increase zip life.
Lastly, it would have been a good idea to reinforce the door tieback loops so that a lateral guy line could be added with confidence.
I would have liked the option of a semi-solid inner to cut down on draughts in the cooler months & would definitely buy one should they become available in a future drop.
It was good that the X-Mid was supplied with some stakes to enable a pitch on delivery but IMO they are generally unsuitable for trail use; I would have liked an ‘add-on’ option for half a dozen 8” gold Eastons as these are difficult to source outside of the USA.
(Edited)
Whiteburn
23
Nov 3, 2019
Adding a buckle across the zip opening is a straight forward job, < 1hr for both sides.


dandurston
5116
Dan Durston
Nov 3, 2019
WhiteburnYes the upcoming batch has webbing across the top of the eyelet/grommet, and also positions the eyelet a bit lower so it should resolve problems of the tip pressuring the top.
(Edited)
Cogs-n-Sprockets
72
Apr 19, 2019
checkVerified Buyer
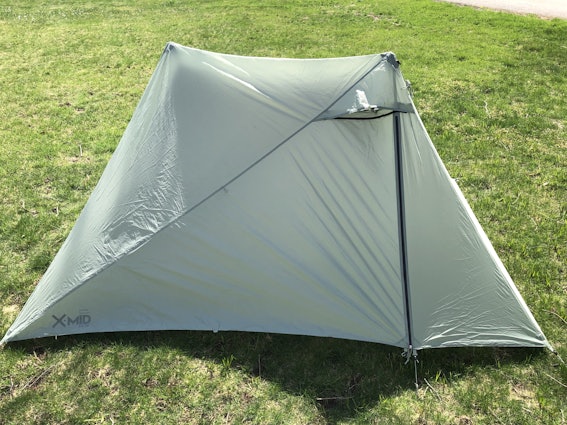
I think this tent is a game changer for the UL community. Dan has put an amazing amount of thought and detail into the design of this shelter. I believe he has found no need to compromise anywhere to attain the end product in the X-Mid 1P.
Where this tent beats the competition, in my mind, is as follows:
1) Cost - for $200, there is nothing else out there that compares to the X-Mid in terms of features, weight, and sheer size.
2) Weight - I challenge any to find a 1 person shelter with as much to offer for under 2 lbs.
3) Ease of pitch - 5 minutes on the second pitch and that can be significantly reduced with practice. There are plenty of easy pitch options out there, but they compromise elsewhere, where Dan does not.
4) Simplicity of design - 4-5 stakes and 2 trekking poles is all you need to erect this palatial tent.
5) Convenience - 2 entry doors, 2 huge vestibules, 2 ample peak vents, integrated peak storage - this is a 1P UL tent! It can be erected in the rain while keeping the inner dry. Oh, and it's already taped and seam sealed.
6) Protection - Double wall with a netted inner and bathtub floor. Inner is inches away from the fly, offering excellent splash protection. Fly goes to the ground reducing splash and keeping water away from the inner and vestibules. Easily-closed vents and vestibules from inside in storms. Sil-poly won't expand when wet, so you don't wake up to sagging walls that transfer condensation to you and your stuff after an all night rain, like nylon. Ability to bolster the tent in high winds with 8 stakes and 4 guy lines. Could add additional guy lines and stakes through the vents from trekking poles.
7) Versatility - Use as a double-wall, as an inner-only, or as a fly-only shelter. If your trekking pole/s break, you can easily substitute a stick.
8) Space - You can sit up, roll around, kneel, change clothes, and store all your equipment, dry and secure, inside the vestibules.
Are there cons? Some nit-picky ones. Well, the inner gets pretty close to you and even touches you sometimes when living in this tent, but I don't find it annoying at all. It could use some additional connection points to pull the inner toward the fly and open the interior a little more. There is sag in the peak of the inner when you put stuff in the storage pockets - a center tie up to the peak of the fly could fix that. I worry about no protective ground sheet, and there is none included (understandable), so I made one out of Tyvek that stays attached to the floor by shock cords. The pitch is easy, but not fool-proof, and it is possible to get a poor pitch if you don't stake out your foundation rectangle well. There are variations in tent weights based on the production run and the sil/PU-coating application - as much as 1.5 oz. in some cases. But, I'm OK with that if it translates to a little extra protection.
Thanks, Dan and Massdrop! Like I said, I think this tent is a game changer for the UL community and I look forward to spending many nights in it!


(Edited)

evincent220
131
Feb 5, 2020
Since you will lack a linelok for tensioning the guylines coming off the trekking poles on an inner only pitch you will want to become familiar with the trucker's hitch. In case you aren't familiar with it I've attached a simple video from Skurka showcasing the way I use the fly's peak guylines for an inner only pitch. The whole video is very educational but I've timestamped it for the portion that would benefit this situation. https://youtu.be/slOhlEmBwwY?t=305
(Edited)

RustyBridges
106
Sep 21, 2019
checkVerified Buyer
My go-to home away from home
After carrying the Xmid for 163 miles this summer I’ve completely fallen in love with it! This being only the third tent I’ve owned in my 13yrs of backpacking, I don’t take replacing a piece of equipment that has become a part of me lightly. I was initially nervous about purchasing an unproven product, but Dan’s knowledge of design and his interactions with the community gave me the confidence that I was in good hands. I wasn’t disappointed. The ease of setup, stability, and versatility combine to fit my needs and my style of backpacking perfectly. (Disclaimer: I would like to stress this last part. I don’t usually review equipment for fear that I may influence someone’s choice, especially something as personal as a tent. Just because the Xmid fits ME and MY backpacking style does not mean it will fit yours, it took a lot of PRACTICE to figure out “me” as a walker...but because Dan has been so active in the community I feel I owe him some feedback.)
The Xmid’s ease of set up is by far my favorite feature! Whether it be in the rain, in the dark, in the wind and even after a lot too much “swag sweetener” the pitch has never alluded me. Now, granted I’m not a perfect pitch nazi and usually prefer speed over looks, a perfect pitch just seems to happen on its own and with out having to watch videos or read walk-throughs. The simple picture on the stuff sac was sufficient. The tent the Xmid replaced in my kit required; a certain amount of finesse when staking down, some laying down to get my sticks in place and a bit of yoga to get into it. In contrast, the Xmid barely requires any bending over (my ever aging back and knees thank you Dan). I will admit that I was a bit confused with which direction to deploy the peak support lines the one time I felt like I needed them, it didn’t take long for my monkey brain to grasp it. All in all, If you can recognize a rectangle when you see one, your in there like swim wear.
The stability of the Xmid was only tested once. Only once because I pride myself in tent site selection. I’d even go as far as saying that I have a 6th or even 7th sense for it. Where some would see a serene babbling stream as a lullaby, I see a nightmare of condensation. You see a beautiful peak sunrise to wake up to, I see a potential wind tunnel, and this was the case when I reached Chestnut Knob late one night. First thing I noticed was a stone walled hut with a door, a quick peek inside revealed no vacancy for my exhausted ass, I had to tent. I don’t know the wind speeds that night but it was troubling to say the least. I almost lost the tent when trying to stake it down! I pitched it low, deployed the outriggers and bunkered down. The tent performed beautifully, some noise was all that resulted, the tent was a rock. I know it looks boxy but don’t be deceived, the Xmid is stout in weather!
The versatility of the Xmid was pleasant surprise to me. Anyone who backpacks the east coast knows that summer turns the Virginias and Carolinas into a rain forest, and this year was no exception. 7/10 days for me was stormy. I don’t spend any time in my tent unless I absolutely have to, the only exceptions being extreme diarrhea, extreme hang over and extreme weather. I have to say the Xmid inner is tight for a stick-bug like me, my head and shoulders touch the netting when I’m sitting up. To be fair though, I knew this going in from the countless detailed pics and measures provided by Dan, also my last tents inner was the same. The difference is that you can unhook and roll up the Xmid’s inner. When I was forced to retreat from the weather early in the day I figured out that I could just disconnect the corners of the inner, tighten the buckles at the top of the inner, and with the addition of two twist ties roll the inner up to hang above while still connected to the fly. This “conversion” method transformed the tent into the perfect bad weather/diarrhea/hangover tarp-like hangout! I just throw down my foam pad and I can move around freely to cook, read and watch the rain while still be protected from the storm. All of this combined with no sagging in the fabric made for a very pleasant retreat. When I was ready for bed I’d just unroll the inner and reconnect the corners and climb in. I realize some will argue this doesn’t constitute “ versatility” but for me it’s huge and a step up from my old tent.
I honestly love everything about Dan Durston x Massdrop X-mid 1. It’s an advanced backpacking tent at an entry level price. It’s color is stealthy and calming, the design is elegant and pleasing to the eye. It’s simple and intuitive to set up. Its stable in winds that I consider dangerous and wouldn’t purposely expose myself to. It’s versatility provides long term comfort in the event where I’d be forced to zero inside of it. And though I’ll admit I had to adjust my site selection from a diamond shaped footprint to a rectangular one, the adjustment wasn’t an inconvenience in anyway. Dans a smart designer and I urge you to read all of the info he provides in the comment section. Though I’ve slept, partied, cried, dried, dreamed, worried, laid, prayed and snuggled in the tent that came before, I’m happy to retire it for the X-mid.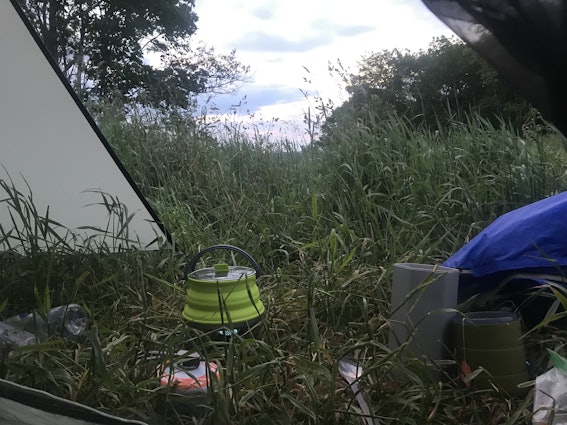

Recommends this product? Yes

GotDraw
25
Jan 2, 2020
checkVerified Buyer
Great Tent Great Value- tested/proven in the mountains
I backcountry hunt in CO every year, have many tents, tarps and hammocks, years of experience in high elevation steep backcountry with base camp tents, 1-3 man tents and top of line ultra light hammocks and cuben fiber tarps. Used this tent as a two man tarp-tent on a hunt this year in the mountains of CO. It worked perfectly, a little snug for two but it was awesome. Super light, set up fast, nice taught pitch, extremely well constructed. It was also wonderful that "out of the box", the tent came with reflective guy lines AND titanium stakes included. Going forward, this will be my tent of choice when I will bivvy out. FWIW- I did swap out the included Ti stakes for some slightly thicker/stronger ones to deal better with really rocky soil.
This tent is a steal for the current $160 sales price and you should buy one if you're on the fence.
I paid $200 for this tent, bought two and was thrilled to get them at that price point. If you also bought one and were thrilled for $200, then you got a deal too. There were a LOT of folks that missed the first round that would have bought yours for that price price or more.
To all the whiners that paid $200 and are now crying about the $160 sale price:
Get over it if you're pissed at the price change-- or risk a couple hundred grand of your own cash and start and run your own gear business. Prices change up/down due to many factors. If the market demand went through the roof and prices skyrocketed to $250- would you send Drop some extra cash (just to be nice) after you bought your tent? Of course you wouldn't.
The guys at Massdrop/Drop are doing the best they can to run a business and make a living. Owning/running a business is not easy, I know because I've done it. I'm sure the guys at Drop have a very challenging time balancing/guessing how much risk inventory to pay for and have on hand in order to have product to sell. And they also need huge amounts of cash on hand in order to be able to structure future deals, so the reality is that they have to balance their inventory on hand against actual sales booked and against their future sales projections for each product and all products together. That multifactor analysis is never easy, nor precise and that's why the price fluctuates. They are the ones risking hundreds of thousands of dollars of their cash trying to stay at the front edge of consumer demand for slick "niche" product at a reasonable price. The Durston tent was a great deal at $200, it's a fantastic deal at $160.
I'm also stunned by the folks whining about "surprise" import duty/tax to Canada. You live in Canada. The goods ship from the US. Where's the surprise? What do you expect? Yell at Canada, not Drop. By they way, there are different categories of taxes for almost every type of product: tent, knife, water bottle..., etc. Be ready for it.
Drop and Dan Durston- thanks for collaborating on a fantastic tent at a very fair price. I look forward to getting the two-man version sometime this Spring!
Hey DROP-- a Cuben Fiber version of either would be slick... ;-)
Best,
JL
nickarkis83
7
Jul 10, 2020
GotDrawWhat length of tent stake do you recommend? I'm going to upgrade the stakes and wasn't sure what was overkill vs to small. I'm looking for something that's a good all around option. (I live Colorado and would mostly be backpacking there.) Thanks!

GotDraw
25
Oct 19, 2020
nickarkis83Wowsa! Sorry for the incredibly late response. I just never noticed that I had a response to my post.
To answer your question, I think my stakes are about 6" long and about 1.5x as thick as the original stakes I got with my tent.
I would not think twice about even 7" long stakes if you will be in high wind.
JL

mejbp
79
Apr 20, 2019
checkVerified Buyer
So like others have said, I could not wait for the trail and set up the tent in the backyard, spending the last two nights in it. The pitch was fairly easy following Dan's many posts on the subject and his video, but it took a little fiddling to get it just right. Construction fit and finish is spot on with nary a stitch out of place and the seam taping is flawless. Being the consummate perfectionist, I could find not a single thing wrong with the tent. It is very refreshing to actually receive a product that is exactly as advertised/designed, so kudos to Dan Durston and the Massdrop team. Regarding the weights, mine is just a tad over on the fly (+1.37 oz), but everything else is spot on: Fly=549g, Inner=280. The X-mid tent hits the sweet spot of affordability, light weight and functionality. I predict a cult following in the UL community (well maybe that is already happening.)
Edit: 5/14- The tent has been out on two backpack trips and performed exceptionally well. Conditions this past overnighter were constant 10-25 mph gusts which the tent handled without issue. The additional photo is from Limber Pines Bench Camp, San Gorgonio Wilderness (CA).
Edit: 9/10- The X-Mid has now graced the Eastern Sierra 3 times with a total of 30 nights deployed. It has seen wind, rain, high altitude, rough surfaces and continues to perform flawlessly. The Polycro groundsheet I made using Dan's dimensions has kept the inner floor without any noticeable wear and the Polycrw doubles as a place to fold and roll the tent when breaking camp. On a recent night in the Sierra the temps hit the dew point and everyone else in our group had significant condensation in their single wall tents...hardly a drop inside or outside the X-Mid. Added photo of off-trail adventure at Sister Lake on August 14, 2019. GPS: 38.020928, -119.473167
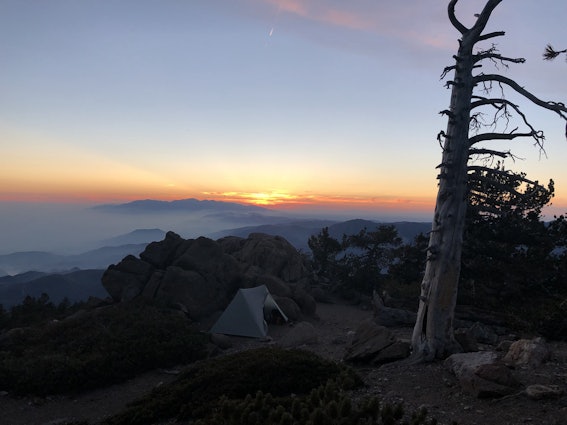
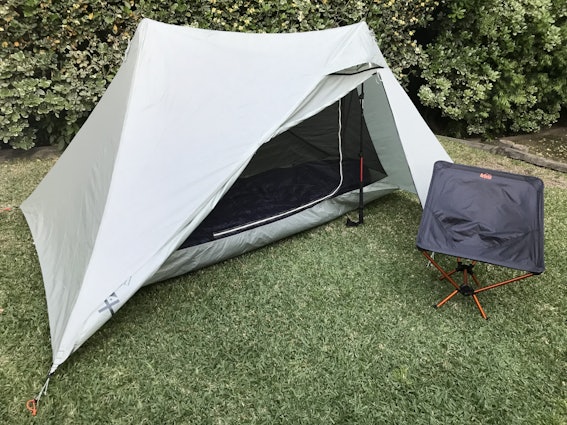
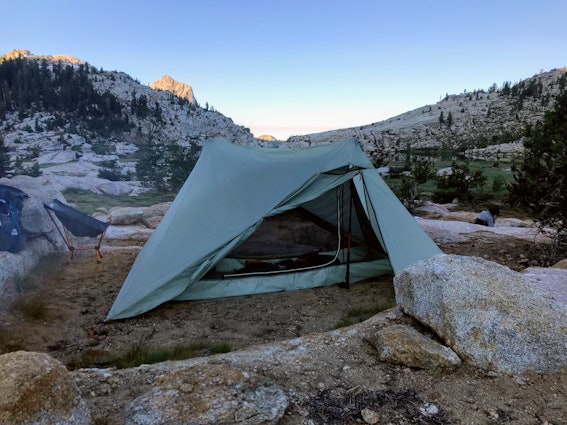


(Edited)

gavainm
44
Aug 17, 2019
checkVerified Buyer


(Edited)
ER-RN
38
Dec 4, 2019
I did mine the same shape and size as the floor. The only thing I protect from the ground in the vestibule is my pack. I just take the rain cover and put it on backwards before I lay it down. Already have it, and don’t have to worry about it bringing water under my tent.

gavainm
44
Dec 9, 2019
ER-RNI've done the same thing for a long time and it worked well for me too. My current pack is waterproof so it doesn't need a cover. Once I did that, I had to come up with another way to keep it clean(er) on the trail. I kept a small square(ish) piece of leftover Tyvek in my pack (probably ~3'x3', called it my welcome mat) to lay my stuff out on or stand on when setting up camp or changing (respectively). It weighs less than 2 ounces and was already in my pack, so I basically just made a little bit smaller version of that to take when tenting (other one was/is for hammocking). In the end, what matters is what works for you. I do agree on the pack cover ... that's an easy way to solve that problem if you already have one in your pack.
(Edited)
KyleRoberts
26
Jun 18, 2019
checkVerified Buyer
I hadn’t previously reviewed the tent because I was waiting until after I had a chance to put it to use on a backpacking trip in the mountains. This past weekend I spent hiking in Montana’s Rocky Mountain Front (just east of the Bob Marshall Wilderness). Over the course of two nights the weather was typical for this time of the year and off and on it rained, hailed, winds occasionally gusted about 20mph and the overnight lows dropped to about 45.
The tent was a wonderful escape from the showers. Truly, the secret “best” things about this tent are the two huge vestibules and the silpoly fabric. I think many people are buying the tent because of its specs and Dan’s support and commitment. (Seriously, it seems like you respond to every comment on every website!). People may buy it because of the specs, but I think the non-sag fabric and the amazing vestibules are the reason everyone loves it. It proved very weather worthy and I stayed dry and sheltered from the breeze. The fact that the fly comes so low to the ground was a welcome design when the wind gusts increased but I remained comfortable in the tent. I gained confidence in the tent quickly and I enjoyed going to sleep with the sound of the rain hitting and running down the fly.
As others have stated in their reviews, the attention to detail and craftsmanship are very, very good. I too had some small issues with the inner netting, but I was able to quickly fix those by rubbing with my fingernail while laying in the tent. More concerning to me was that my poles (BD Trail) produced the bump in the fly fabric that others have noted. The deflection was very slight and I was not really concerned, but I found an easy - and different solution than some others have employed.
I was originally going to use the grommet that had been discussed on the forums at trek-lite. However, that seemed finicky and because the rubber grommet is so thick, the grommet itself would then create an impression in the fly (although not sharp like a carbide tip). I was also afraid the thickness of that grommet might impair a good handles up pitch. My stop gap measure (while I figured out the best long term solution) was simply that I was going to put a rubber washer over the tip of my pole before setting up the tent. So I headed to my local hardware store to buy a couple of washers that would do the trick. I hadn’t done any of my own research into grommets because of all the info that was already available on forums online. But as I was standing in the aisle of various hardwear bits, I took a chance and opened a tray filled with grommets of various sizes. I didn’t have the tent with me to check sizes but I grabbed a couple that looked about right. When I got home and got out the tent, I found that these standard, off-the-shelf grommets were perfect! Because the outer bumpers of the grommet are so thin, they do not press against the fly at all and don’t cause any issues pitching handle up. I could not be happier with how they worked out!
I only made two other changes to the tent. First I swapped out 6 of the included stakes for DAC J-Stakes (corners and guylines). I also added short loops of the thinnest cord I could find for the midpoints of the fly perimeter.
With those simple changes I was very pleased with the performance of the tent. I have only two tiny complaints. First, I wish it was a few inches wider inside. However, I sleep on a Nemo Tensor long and wide pad (25” x 76”) and it does still fit comfortably. I also found myself wishing there was a corner pocket next to the door. The ridge line pocket is great, but I would have loved for a second pocket close to my sleeping bag zipper for items that I might want in the night. Instead, I just set those items on the tent floor above my head (in the triangle of space created by the rhombus shape of the offset inner).
I am attaching pictures of the grommet to this review for others looking to make the same improvement.
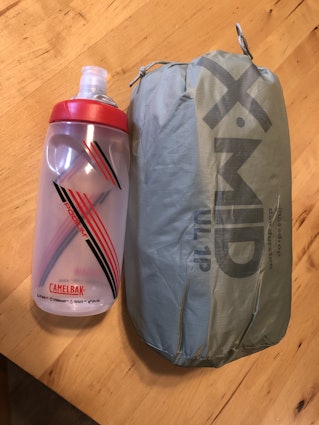
Edit: I should add that I have not had any trouble fitting the tent back in the stuff sack. As a matter of fact, I was taking down the tent quickly on Sunday morning due to the rain and I accidentally left my headlamp in the ridgeline pocket. Even with the added bulk and a wet fly it rolled up fine and fit in the bag without any hassle.
Edit #2: I was just back at Ace and it turns out the grommets were out of order and messed up in their bins. That caused me to take a picture of the wrong grommet sizing info. I have taken a new picture (of the grommet info) and changed the photo in this review. Sorry for any confusion my well intended efforts may have originally caused.
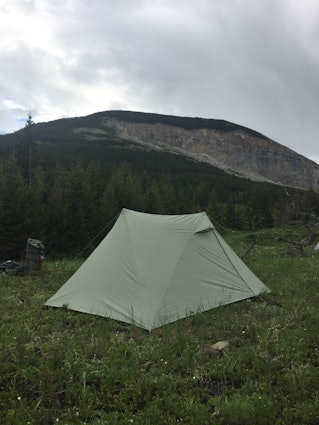
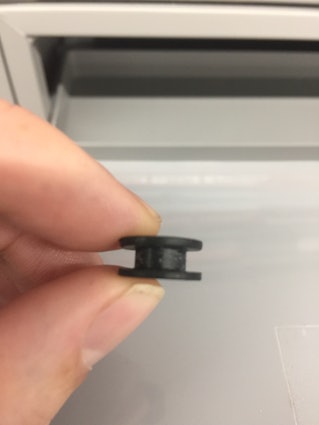
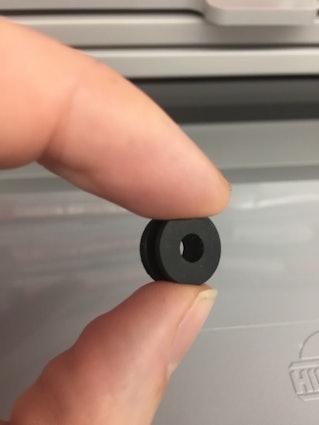

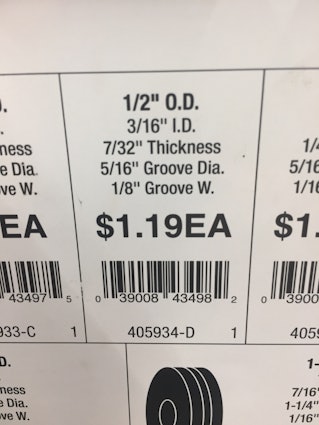


(Edited)
Recommends this product? Yes
dlxah
1
Sep 25, 2020
KyleRobertsAppreciate the tip about the grommets! I found the same ones at Lowes, and they work perfectly with my Alpine Carbon Cork poles.
(Edited)

Andyp70
6
Apr 23, 2021
KyleRobertsI found these on Ebay. They are an alternative option to grommets. I have fitted them to the existing grommets with chord so are removable if needed. They fit in position fine and it takes half a second to locate the pole tips when setting up camp now 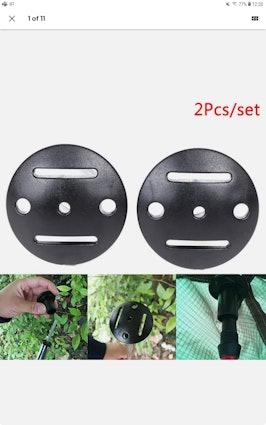

Chastro
41
Jun 3, 2019
checkVerified Buyer
The x-mid arrived just in time for my 14-days on the Larapinta trail in Central Australia. We camped on red dirt, sandy dry riverbeds, rocky ridges. We had wind, rain, and temperatures ranging from 1C to 29C. What a great way to get to know a new tent!
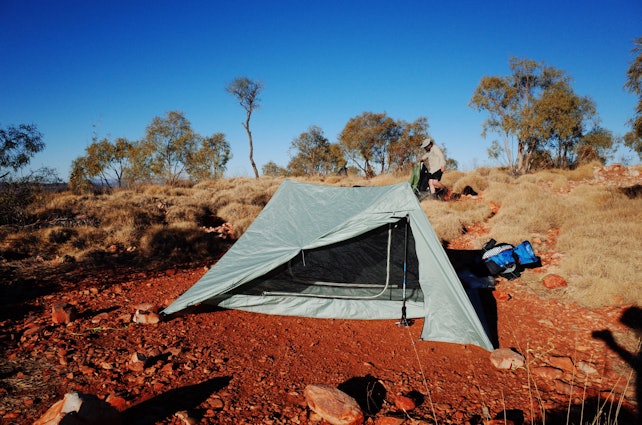
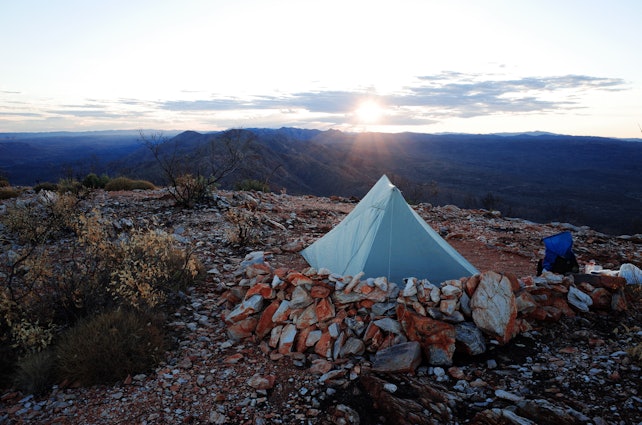


- It really is an incredible tent for the price, or for any price!
- The materials and workmanship are top quality.
- After a tiny bit of experience your pitches will be lightening-quick, taught, and sturdy.
- The polyester feels much stronger than the sil-nylon used on my Big Agnes UL1 or my mate's MSR Hubba.
- The zips are fantastic - also much stronger than I am used to. After a little use they became smooth and easy to operate with one hand.
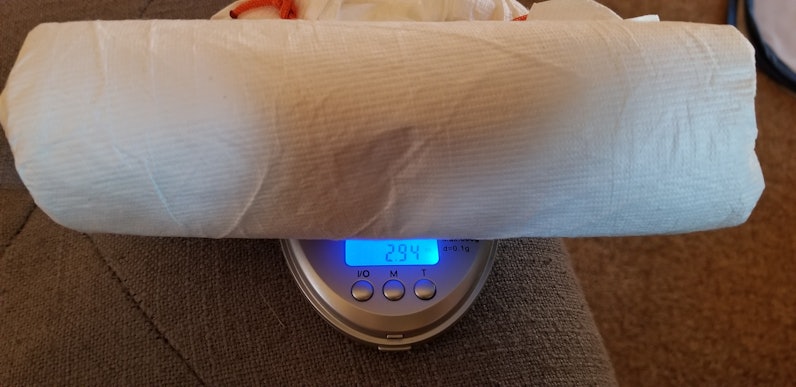
- As others have noted the weight is a bit higher than spec. My measurements were inner=549g, fly=289g, guylines=19g, for a total trail weight of 857g excluding stakes.
- The x-mid comes with nice titanium shepherd-hook stakes. I took 2 of those on my trip, as well as 4 MSR mini-groundhogs. I like mixing types. I think 6 stakes was about right. If there's no wind you only really need 4, but the other 2 are nice for the corners of the doors. In windy conditions you may want to use them in the optional anchor points and/or deploy peak guylines.
- If you put a peg in the optional anchor points along the long sides of the tent, you wont be able to roll the fly doors up enough to fasten them. I used some spare cord to lengthen the door-fasteners.
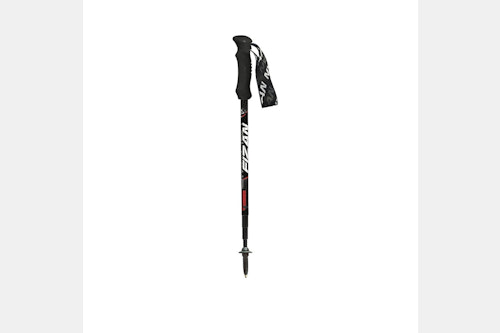
- My trekking poles (Massdrop x Fizan Compact poles) fit the peak gommets perfectly. Others have aired concerns about the carbide spikes pushing into the fly material, but I didn't notice anything like that.
- I discovered it is really easy to control the pitch height. This is done through the length of the guy-outs from the 4 corners of the fly. If you make these short before you start, the whole tent will sit lower to the ground, and reduce drafts entering under the fly.
- While the x-mid is strong enough to use without a footprint under normal circumstances, I used a polycryo sheet (27g) because of the amount of abrasive material (rock and sand) we'd be seeing on the Larapinta.
- For a taught pitch, make your poles a little longer and set them on slight outward angles (so the handles are closer to each other than the tips). This helps to tension the ridge line. Also if you deploy the peak guylines, they should be drawn out parallel to the ridge line. This too helps to tension the ridge line.
- When pitching in the wind, you want to have the wind parallel to the ridge line. This is pretty important.
- It is easier to set up and pull down if you leave the inner attached to the fly (it has clips). But when it's raining, I love that I can unclip it and pack it away dry, before pulling down the fly.
- No water got inside the tent on the rainy days, and when there was condensation on the fly (1 day out of 14) it didn't bother me inside the mesh.
- Overall the footprint (including the vestibule area) is quite big. When space is really tight, freestanding tents like the Big Agnes UL1 and MSR Hubba 1p have an advantage.
- The living area is small (normal for a 1p tent). The head room is very good.
- The 2 vestibules are huge. I usually kept a couple of handy things in the front vestibule (stove, water, shoes) and then stowed my pack in the back vestibule.
(Edited)

dandurston
5116
Dan Durston
Jun 5, 2019
Thanks! Do you have an Instagram account or something I can give the photo credit too?
Looks like a sweet trip. Really cool geology with those cliffs and rocks. Great job on all the pictures. I'll have to make to Australia one of these years.
Chastro
41
Jun 5, 2019
dandurston@chasegan Cheers, I appreciate that. The geology is pretty special - great big folds of sedimentary rock laced with mica and quarts. Now all very geologically stable. The Finke River that cuts across the trail is one of the oldest in the world.
(Edited)
Showing 59 of 540
Recent Activity
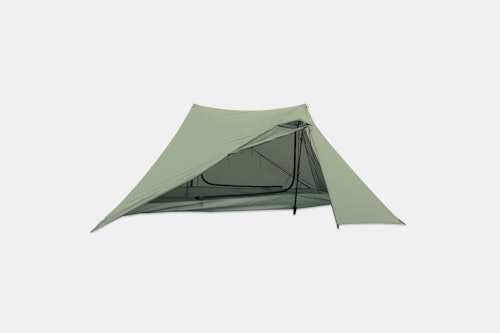













- - Carry a bit of guyline just in case (perhaps you do this already). The very first night in Yosemite a rogue bastard squirrel ran under my fly when I stepped away and chewed the long single cord that tensioned the inner in half! I had some guyline with me as part of my kit but then realized even more so the importance with this particular shelter that you have extra cordage since the inner's shape totally depends on that cordage creating the parallelogram shape.
- - If pitching fly first and attaching the inner second make sure the short ends of the x-mid are nice and taut. If they're too loose when the inner clips in it can cause those ends to sort of collapse due to the increased pull from inner's tension.
- - I personally found it easier to always remove the inner and pack the two separately into the stuff sack (lay the folded inner on top of the fly and roll them up). It seemed like it was more fussy to leave everything attached when trying to fold and roll up. I always attached the mitten hooks to the grosgrain instead of the plastic D rings for ease of removal and would advise doing this if you plan on removing the inner the following day when packing up.
Overall, I found this tent to be a joy to use with very minimal issues. I'd have given it 4.5 stars but I couldn't give it just 4, hence the 5. Nothing is perfect but it comes close. I'm very happy with the purchase and would not hesitate to take this shelter on any long distance 3 season trip. I have also ordered the X-Mid 2P and I'm sure it will also exceed my expectations. I hope you found this review helpful. -Emmanuel