Click to view our Accessibility Statement or contact us with accessibility-related questions
JnyJny
72
Aug 31, 2018
checkVerified Buyer
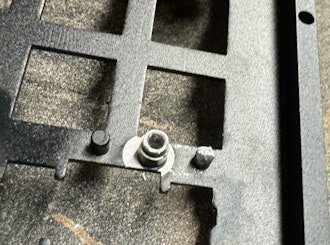
Plot Twist (and a happy ending!): It's been nearly two years with my Tokyo60s; one at home and the other at work. For the last couple of weeks I've experienced problems with my mouse being jittery but chalked it up to an old mouse showing it's age and replaced it. The jitteriness in the mouse did not improve with a new mouse. Today I noticed that my Tokyo60's USB connection was loose, and upon further inspection I discovered that the USB female port had become desoldered from the PCB! I am heartbroken! I could solder the big pads, but those four thin pads are beyond my soldering skills. Updates to follow. Update 1: 15 Apr 2020 After interacting with Mass (formerly Massdrop) customer services, I was given the opportunity to buy a replacement PCB (USB-C rev). I accepted their offer and am awaiting delivery of the new PCB. ¯\_(ツ)_/¯ Update 2: 1 May 2020 After some minor difficulties I have installed the new USB-C PCB board and have a working keyboard once again! The difficulties were entirely USB-C cable related, specifically the board would not function with a USB-C to USB-C cable. This apparently is a known issue in the discussion that I was not aware of. After ordering a USB-C to USB-A cable from Amazon I was able to successfully flash the new board with my preferred key map and get back to work. As an aside, using the USB-C to USB-A (male) cable with a USB-A (female) to USB-C cable worked on a USB-C equipped MacBook Pro. Thank you Massdrop Drop for helping me get back to my happy typing place! Update 3: 21 Jan 2021 (A Small Defection) One of my replacement Toyko60 USB-C PCBs developed an intermittent fault where the board would lose connection and go dead and require a unplug/plug cycle to restore function. I spent some time looking for an obvious physical defect, swapped cables, swapped host ports, swapped hosts, and reflashed the board. The board continued to go dead with increasing frequency. It was time for a new PCB. My first idea was to order another Tokyo60 PCB to replace it, however while googling I discovered the 1UP 60% Hotswap Tsangan Edition (1up60hte) PCB which claimed to support HHKB builds. The cost of the board was roughly comparable as was the feature set, so I ordered one to see if it would be a suitable replacement. The short story is yes, the 1up60hte board is a good fit for the Tokyo60 chassis. The board has through holes in all the right places for the top plate mounting screws, the USB-C connector position matches the case's port opening and all the board's hot swappable switch sockets match the top plate's switch openings. The board supports QMK and my board arrived flashed for the Tsangan layout. Flashing the board to a HHKB layout was relatively straightforward, the default config.qmk.fm HHKB layout was "empty" requiring me to assign all the keys. After that the board entered DFU mode when the bottom mounted reset switch was depressed and flashed successfully. My keyboard is back in action however my Tokyo60 purity is compromised. :) First Impressions I ordered two kits, Space Grey and Black, and both kits came beautifully packaged and provisioned with all the parts advertised. I could have benefited from some directions; stabilizers first, then mount the PCB on the top plate, install switches and key caps, and then finally put on the bottom plate. My kit came with 61 keyboard switches and I needed every one of them. This was my first experience with solder-free switch sockets and I had some difficulty with bending the switch legs if they were misaligned. The legs were easy to fix with a needle nose pliers, however I did manage to mess one switch up beyond easy repair. The cable that came with the kit is nice and fabric wrapped, however it is white in color when I would have preferred black if given a choice.
search
Above: super sweet packaging.
search
Above: keycaps, USB cable, stabilizers and screws, super clean printed circuit board in orange bubble wrap, adhesive feet and loosely assembled top and bottom plate.
search
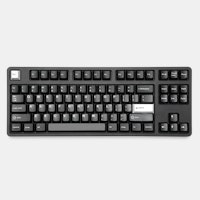
Above: assembled Black keyboard with first season keycaps. I love the feel of this keyboard! Insanely stable compared to my KbdFans HHKB sandwich keyboard which has a great deal of flex in it. The Tokyo60 is a tank in comparison. No regrets whatsoever and would recommend it to anyone interested in a quality HHKB-style keyboard with MX switches. Three days later... I am delighted with this keyboard and the build quality of the units I received, but I was starting to notice some problems with the key mappings. No problem right? Change the firmware with QMK and drive on! Problem #1 The QMK configurator at https://config.qmk.fm/#/tokyo60/LAYOUT_60_hhkb doesn't have a default keyboard layout defined. Not a killer, just time consuming to click each key and press the corresponding key on the keyboard. Consequently discovered that right shift, right alt and right GUI were all mapped to their left counterparts. 1 May 2020: This is no longer a problem the configurator has the default keyboard layout and looks great! Use that link with confidence. Problem #2 After altering the key map to my liking, changing KC_ESC to KC_GESC and moving the media keys around, I downloaded the firmware to flash with QMK Toolbox. I had to search extensively to figure out how to put the keyboard into bootloader mode. I'll save you some trouble: the QMK docs say L_SHIFT+R_SHIFT+PAUSE. In the default key map, PAUSE is FN+p. If QMK Toolbox is running you should see "DFU device connected" when you successfully perform the key press. The PCB controller is a "atmega32u4", which I found defined in the Tokyo60 source for building the QMK firmware.
search
Above: Tokyo60 ready for flashing. After digging up that information, flashing the new firmware was quick and easy. Hopefully my experience will save others some trouble. Key Mapping Learnings 1. Add PAUSE somewhere in your key map so you can put it back into boot loader mode in the future. It's not the end of the world if you forget it, you'll just need to take the bottom plate off to access the hardware reset button (purple button, middle right-hand side of the PCB). 2. The function key in the QMK configurator stable of keys is labeled MO and needs a layer number, e.g. MO(1) 3. It's handy to have a second keyboard available when flashing a new firmware, but remember to switch to the flashed keyboard to avoid "frustration" when the new map doesn't work. Default Function Layer

search
Above: Tokyo60 default function layer This diagram was posted in discussion, but it might be easier to find here. Finally, I've written a short firmware flashing guide that can be found at: https://github.com/JnyJny/tokyo60_keymap/tree/master/firmware In addition to the guide the repo houses my current Tokyo60 keymap as well as visual keymaps. The Second Keyboard As mentioned at the beginning of the review, I purchased two keyboards. The second keyboard I left out the switches and keycaps, expecting to play with different switches and keycaps. I sourced some Kaihau Purple Pros and recycled some PBT keycaps donated by another HHKB-style keyboard. After using the Zealios 65g tactile switches, the Purple Pros felt dead and mushy to me in comparison. And the donated keycap set was missing a 7u spacebar. Things were ugly and bad, through no fault of Massdrop or Tokyo60. I ordered a 65-pack of more Zealios (1UP keyboards FTW!) and went about taking out the Kaihau switches when they arrived. The posts on the Kaihau switches were a little tight, so poking them out of the PCB was a little nerve wracking. After removing all the switches, I made my first and most costly mistake (in terms of time). I did not check to make sure that the stabilizers were still properly installed. After installing the new Zealios and testing the switches, I began putting on keycaps. I was almost done, putting on the last keycap; left shift. And it was sticking. Looking at the stabilizers, the bar had shifted when I took the board apart and it was not moving freely. And the only way to fix it was to remove the switches. All the switches. So after saying some words that I won't repeat here, I pulled all the switches from the board and fixed the left shift stabilizer. First things first, I installed the switches for all the stabilized keys and their keycaps. Tested that the switches were making contact and that the stabilizers were doing their job, stabilizing. Then started putting in switches a row at a time, testing the switches at the end of a row. Even though this is my fourth switch install, I still bend legs occasionally. When the switch legs get bent, it's no big deal to pull the switch and straighten the bent leg with a needle nose pliers. I ordered a PBT HHKB-style keycap set (with a 7u spacebar!) from YMDK via Amazon. It arrived surprisingly quick, less than two weeks. Thanks YMDK! I replaced the Fn keycap with a 'Code' from GMK 3RUN keycaps. I am happy with how the second keyboard turned out despite having taken somewhat longer to get it up to par with the "stock" configuration.
search
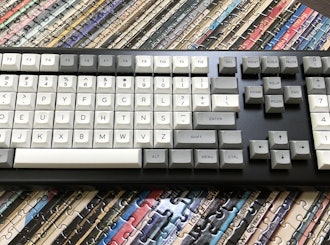
Above: Space Gray with YMDK keycaps and GMK 3Run Code keycap. 
search

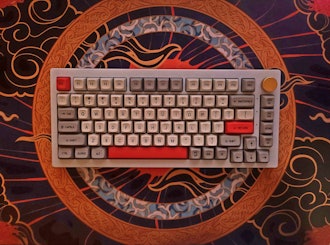
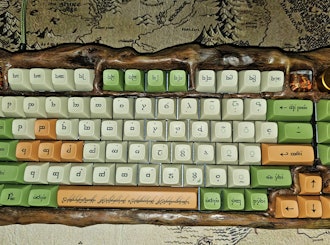
Above: Tokyo60 Space Gray with SA Green Screen (Amber), SA Control Code mods & PBT Orange 7u Spacebar  I love these keyboards and I am a very satisfied customer. Thank you @tokyocoffeenerd and @YanboWu!
(Edited)
WinstonZ
23
Sep 2, 2018
JnyJnyNice review! The programing part is really helpful.
sK0pe
85
Sep 8, 2018
JnyJnyThe alternate to looking for the software flash was to use the hardware flash button on the PCB. The same thing happened to me in that I wasn't able to flash immediately (I was flashing from command line using DFU-Programmer and I had written my own keymap, I understand this is not easy for many people, it's just faster for me because I'm a programmer and the task is trivial). Using the hardware flash button took me about 10 seconds to work out as usually QMK will force a PCB into flash mode and upload the hex file.
I wasn't a fan of how the tolerances in the renders were different from the final product though. I'll probably just use this one for work.
JnyJny
72
Sep 8, 2018
sK0peSounds like you need to write a review of your own! Personally I don't understand the brouhaha over the tolerances in the render versus the actual product. Everybody has their own opinion and I respect that people are upset, I am just not one of them.
Thanks for reminding us about the reset button, I'd forgotten to mention it here.
Moonwolf
56
Sep 18, 2018
sK0peI could not flash even after it said 'DFU device connected'. Are you saying using the hardware button to flash should work better?
sK0pe
85
Sep 19, 2018
MoonwolfGenerally a hardware flash button will give you the assurance it is working, there's no better or worse about it , I was just recounting that I had issues because on many PCBs DFU will flash regardless of the state because it will force the chip into an appropriate mode however I did not do it in the way described above, I did it from a linux command line.
tommytripp
49
Sep 23, 2018
JnyJnyBoth boards came out looking great, but I'm particularly jealous of that second one!
hardstyle
0
Mar 3, 2021
JnyJnyHello JnyJny, Do you using VIA(https://caniusevia.com/) application? I would like to build with RGBLight animation. Do you have experience?
PRODUCTS YOU MAY LIKE
Trending Posts in Mechanical Keyboards