Click to view our Accessibility Statement or contact us with accessibility-related questions


Programming the Red Scarf Keyboards

search
close
Sort by: Newest
keyboard_arrow_downmankeroo
13
Oct 15, 2018
I must have built up static electricity walking around the office, and when I sat down and started to type, I shocked my Red Scarf III. Now when i hit some of the keys, I get strange output like '4rfc' instead of r. I don't think my ESC key is working so I can't get into boot loader / printer mode when I hold ESC and plug it in. It's always just recognized as RedScarfIII. Is there any way to FORCE it into bootloader mode so I can reflash the key layout and hopefully save this board?
kerrizor
13
Mar 18, 2019
mankerooI've had mine for 2 years or so, perfectly fine until today.. based on some basic scouring of the message boards, it reads like a fried PCB... oh well, I'll just have to use one of the 8 other keyboards within reach...

SvenB
5
Oct 10, 2018
Whenever I try to add the keyboard for firmware update, Windows 10 identifies it as a, "RedScarf HID EEPROM" Unspecified device. Is there a trick to make it show up as a printer?
EVILGibson
3
Jul 27, 2018
Can someone kindly post the article's KLE downloads on pastebin and NOT tinyupload.
All of the tinyupload links are dead.
TooTallTim
44
May 7, 2018
Since the links for the FN code are now dead, here's the FN codes shown in the article:
"0":["ACTION_LAYER_MOMENTARY",1],"1":["ACTION_FUNCTION","3",0],"2":["ACTION_FUNCTION",4,0],"3":["ACTION_FUNCTION",1,0],"4":["ACTION_FUNCTION",0,0],"5":["ACTION_FUNCTION","5","1"],"6":["ACTION_FUNCTION","5",2],"7":["ACTION_FUNCTION","5",3],"8":["ACTION_FUNCTION","5",0],"9":["ACTION_FUNCTION","5",4],"10":["ACTION_FUNCTION","5",5],"11":["ACTION_FUNCTION","5",6],"12":["ACTION_FUNCTION",6,0],"13":["ACTION_FUNCTION","5",7],"14":["ACTION_FUNCTION","5",8],"15":["ACTION_FUNCTION","5",9],"16":["ACTION_FUNCTION",6,1],"17":["ACTION_FUNCTION","5",10],"18":["ACTION_FUNCTION","5",11],"19":["ACTION_FUNCTION","5",12],"20":["ACTION_FUNCTION",6,1],"21":["ACTION_FUNCTION","5",13],"22":["ACTION_FUNCTION","5",14],"23":["ACTION_FUNCTION","5",15],"24":["ACTION_FUNCTION",6,1]
This doesn't include any backlight functions, which you may want to add to FN25-FN28
NhatHoang2205
1
Mar 13, 2018
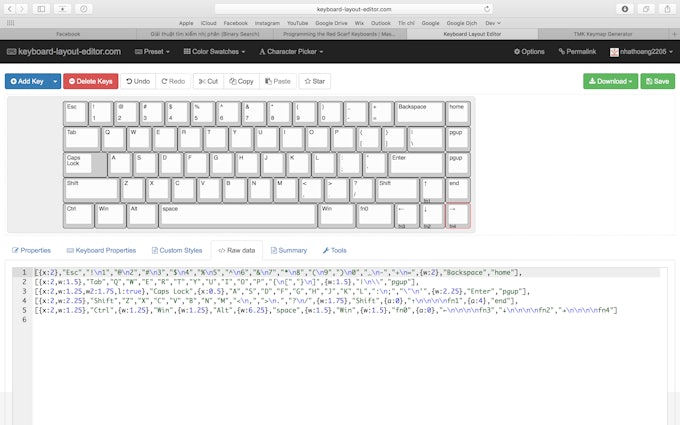
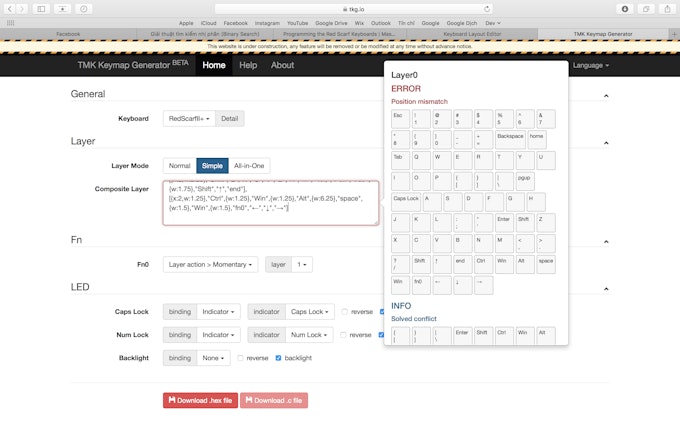
Does anyone have the same issue? I can't figure it out what is "POSITION MISMATCH" in this case!


mbsurfer
133
Jun 29, 2017
I'm having trouble getting a num lock indicator working. Is this supported by the firmware? My caps lock indicator is working fine, and flashes when in bootloader mode.
that would do it. I can try to take a look this week at mine and see what it is using
Paprika
57
Jun 11, 2017
I am running windows 10 and am unable to install the printer driver to flash the keyboard - my backlight isn't working T.T
tadavidsta
20
Feb 2, 2018
did you ever get this working? Im trying to program one now. basically having the same issue you describe
Paprika
57
Feb 2, 2018
tadavidstaNope. No one ever helped me. I just lived without back lighting until i got a new case/board. Very dissapointed that no one even othered to respond. I scoured the internet looking for answers, but found none.
jceaser
359
Jun 2, 2017
what is the difference between uploading an EPP and flashing with a HEX? I understand flashing, your replacing the basic code on the processor and loosing the original. My question is what is an EPP? Is this software executed by the firmware or as you say a "configuration file"? Can an EPP by compiled from QMK or only TMK?
mankeroo
13
Apr 22, 2017
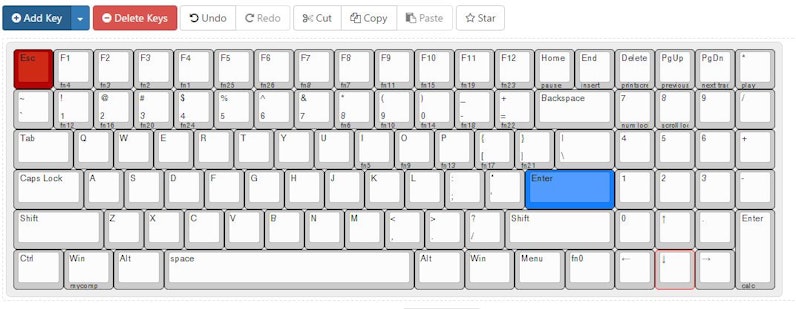
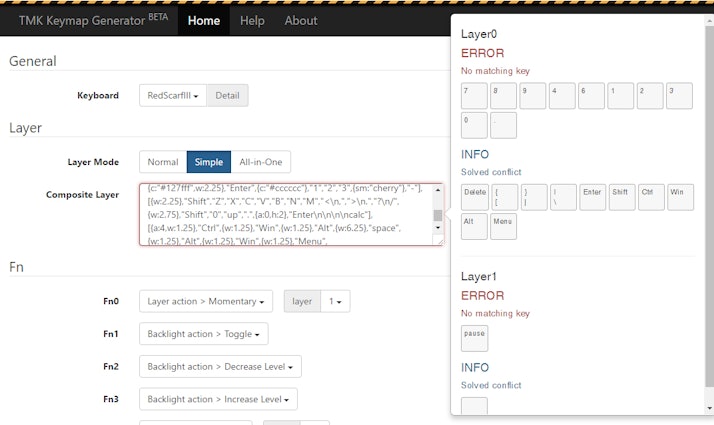
I keep getting "no matching keys" errors for the numbers on my numpad when pasting the KLE raw data into tkg.io. I've modified the layout a bit, but it doesn't seem like it shouldn't work. Strangely I get similar errors even when pasting in some of the sample KLE's provided above.
Here is the raw data for my layout, can anyone figure out what I'm doing wrong?
https://pastebin.com/EUKdKiNi
Here is the raw data for my layout, can anyone figure out what I'm doing wrong?
https://pastebin.com/EUKdKiNi


Showing 25 of 63
PRODUCTS YOU MAY LIKE
Trending Posts in Mechanical Keyboards

lantz
Red Samurai on a 75%
Corsair K65 Plus Wireless GMK Red Samurai Moondrop Tactile Tessence
Apr 19, 2024

Keyled
My PRECIOUS!!!!
All that sweat and money paid off. I will use it wisely. Tokyo 60 GMK Serenity Gateron Oil KIng
Apr 19, 2024

TotallyJaded
How do you do per-key RGB lighting on a Shift V2?
I saw the online configurator that lets you do this on the Shift V1, where it spits out a compiled firmware file to flash. The V2 doesn't seem to have this function in the Windows configurator, though. I can't imagine the answer here is "you're going to have to manually write the hex for every key in QMK, compile it, and flash that".
Apr 18, 2024

AiheyStudio
Favorite Artisans
Dragon Pillar Artisan Keycaps Creative Resin Keycaps for 6.25u and 7u Space Bars
Discover the allure of our Dragon Pillar Artisan Keycaps – unique resin keycaps designed to adorn your 6.25u and 7u space bars. Crafted with creativity and precision, each keycap features an...
Apr 18, 2024
lwthunder
Drop CTRL V2 Mechanical Keyboard PCBA
If I want some hot-swap socket for replacement, where I can buy to ensure it fits this PCBA?
Apr 17, 2024

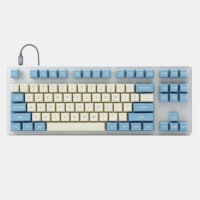


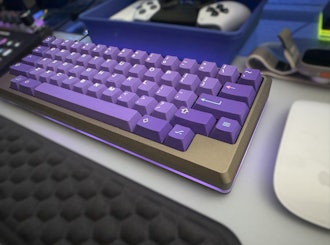
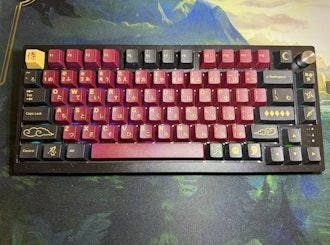

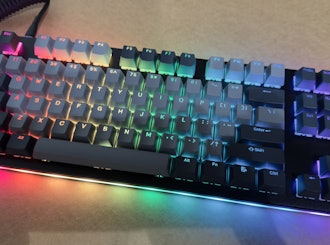

Introduction First off, GeekHack users azhdar and Ryu and kai1103 have done most of the grunt work in organizing a lot of the data on how programming the Red Scarf series of boards works on this GeekHack thread (https://geekhack.org/index.php?topic=69282.0). Definitely a thread worth checking out for more information! Please make sure to get the manual by kai1103 as well, it is a PDF available for download in the linked GH thread!
For this guide I have been using a Red Scarf II( (96 key layout) but this should work for the other keyboards in the series as well. I will update it once I get the other keyboards to tinker with if needed.
I have made the raw data available for KLE for all possible layouts available to download at the bottom of the page. For some layouts I will go ahead and include the FN Import text for TMK and the .eep files .
Overview The Red Scarf keyboards are relatively easy to program once you understand the process. You will be using Keyboard Layout Editor (KLE), an online layout creation tool, and TMK Keymap Generator, another online tool that will actually create the configuration file to be flashed to the keyboard.
In this guide I will be going over the easiest way I've found to create a layout and flash it to the keyboard. Obviously one of the key selling points to the RS keyboards are the fact that they have quite a few possible layouts. Here are the possible ones for the RS96 that I built:
Creating Your Keyboard Layout in Keyboard Layout Editor Keyboard Layout Editor (http://www.keyboard-layout-editor.com/) is an excellent online tool that can be used for a variety of things. We will be using it to create the layout for the Red Scarf. To begin, you will need to perfectly replicate the layout of your keyboard in KLE. The easiest way I have found to do this is go to Preset -> ANSI 104 and edit the keyboard to match the Red Scarf Layout from there. (If you need help using KLE be sure to read the Help and Keyboard Shortcuts at the bottom right of the page). Be sure to perfectly replicate the physical layout of your keyboard.
- Note: During this stage while you are setting up your keyboard layout, go ahead and label the spacebar as space in the top legend slot. Without doing this the space bar will not register after flashing the new layout to the keyboard.
This is what my layout came out looking like:The simple layout FN layer is created by putting any keys or controls that you want to be on the FN layer onto the front legend of the corresponding key. Please use ONLY the labels allowed by TMK, for a full list of available labels see the TMK help page (http://tkg.io/#help)
- Note: Before going nuts with the FN keys, I should note that Fn1-Fn24 are used by the remote for lighting controls, leaving you Fn25-Fn32 to use as you please.
Having a remote for the Red Scarf keyboard can be a fun little trick to have, but honestly I don't want to have to rely on a remote every time I want to change the color of SMD LED's on the bottom of the PCB every time. It is possible to program every single button from the remote right into the FN layer of the Red Scarf. The remote cooresponds to the Fn# as shown in this image by azhdar:- I would STRONGLY recommend that you login to GitHub or sign up for GitHub so that you can save your newly created layout in KLE. This will allow you to create multpile layouts to try, or allow you to pull up the current layout of your keyboard again if you need to. Save often!
Creating the Configuration File In TMK Keymap Generator Keeping the KLE tab open in your browser, head over to TMK Keymap Generator (http://tkg.io/#). The very first thing to do when hitting the page is to select the keyboard you are creating a layout for in the General - Keyboard tab. In my case it was the RedScarfIII.Next under Layer - Layer Mode select Simple. This is telling TMK that you want to use the front legends as the FN layer essentially.
Finally it is time to post the raw data from KLE into the Composite Layer box. Open up your KLE tab again and click on the raw data tab under the keyboard layout. Select and copy all, and post it into the Composite Layer box. If done correctly, wait a few seconds and you should see a string of FN options appear in TMK Keymap Generator.
The FN layer is where you will actually define what the Fn's do that you set in KLE. Setting up the lighting is the major task that I will show you how to configure.
First, set the Fn0 as Layer action > momentary and select layer 1 in the second drop-down box. This will set up the key as a standard Fn key able to access the Fn layer (any key on the front legend's in KLE).
To set up the lighting simply copy the Fn actions as seen in my image below:
Now that lighting has been set up, finish selecting what any additional Fn's you may have added should do.
Flashing The Keyboard The Red Scarf boards should ship with the newest firmware already on them, and we are not flashing new firmware to the keyboards. This is a good thing, because if you screw up the process you won't brick the keyboard. All we will be flashing is a configuration file (.eep) and not the firmware (.hex) file.
If you have entered in all of the information correctly you should see the Download .eep file at the bottom of the page go from grey to green. TMK Keymap Generator will not allow you to have errors in your layout.
- Note: the most common errors you will get will come from having the wrong labels used in KLE, and TMK can't recognize them. Should this happen simply fix the errors in your KLE file and paste the corrected raw data into the box.
After you have downloaded the .eep file open up Notepad. After you have Notepad open find the .eep file in the file broswer and drag it into Notepad.Questions and Updates Should any new information get added to this guide I will make note of it here with the date of the edit to keep it easy for everyone to have the most current information. I will also make any updates needed as I get other keyboards in the series.
I will be working on some KLE files of the most popular layouts along with .eep files to go with them and share them on my GitHub when I have time.
If you have any questions feel free to contact me here, on GeekHack, Deskthority, Reddit, or from my website KeyChatter.com.
Layouts w/ .eep Files To Download I will make a few layouts and have them available to download from here. Remember, the physical layout of your keyboard will have to match the layout of the .eep file exactly or it won't work correctly.
Winkeyless w/ Arrow keys (7u Spacebar)
- This layout includes full control of the lighting on the remote as well as full mouse control (movement and buttons).
- .eep download: http://s000.tinyupload.com/?file_id=47440279504389788586
Or if you want to tinker with my layout a bit:Winkeyless w/o Arrow Keys (7u Spacebar)
6.25u Spacebar w/ Arrow keys
Standard 6.25u Layout w/o Arrow Keys
6u Spacebar w/ Arrow Keys