Click to view our Accessibility Statement or contact us with accessibility-related questions


Tailoring a keyboard to your needs

search
close
Sort by: Newest
keyboard_arrow_down
Anakey
69
May 26, 2016
How do you create multiple layers in the Keyboard layout editor page? I have looked for a while at trying to butld my own plank layers but i can't figure out how to get multiple layers displayed at once on the screen, hope i am making sence with this.

ChuckDee
1906
May 20, 2016
Great guide, especially for someone like me that is just getting into MK. I've had programmable keyboards (mostly logitech, though I did do razer for a while) for a while, but never really got into programming them. This hobby made me see it differently than just gaming macros, but I still didn't have a good handle on how to plan until I read this. Thanks!

Makami
4255
May 18, 2016
Well written Sir, all that's left to be done now, get yourself an usb to usb converter by hasu and take your layout with you everywhere to use with allmost all keyboards available and make other people/friends astonished what their keyboards can be tuned to :).
https://geekhack.org/index.php?topic=74708.0 - https://geekhack.org/index.php?topic=69169.0
https://geekhack.org/index.php?topic=74708.0 - https://geekhack.org/index.php?topic=69169.0

Makami
4255
May 18, 2016
zndrThat's the fun about it, i had been visiting a friend the last days, plugged the controller without letting him know, typed a little bit later and told him his keyboard might be broke doing "weired" stuff.
That was mean, but the look on his face was worth it :)
PRODUCTS YOU MAY LIKE
Trending Posts in Mechanical Keyboards

RealRage_TV
software?
Hi I'm new to Drop and i just received my Keyboard i have been waiting for months for by Drop x MTN Dew x Borderlands movie and didn't know if there was a software like Logitech's for the keyboards. if anyone could help please let me know
Nov 20, 2024

jdsvdropper
Drop ENTER keyboard with DCX Sleeper Mac variants and Rocky Bird
Black Drop ENTER keyboard with DCX Sleeper Mac variants for the Option and Command keys, and Rocky Bird red and black DCX keycaps.
Nov 19, 2024
AngryTank
Favorite Artisans
COME FORTH SHENRON!
Purple, Dragon Balls, and Seta! What more does a simple man need?
Nov 17, 2024
InsufferablePedant
ZealPC Aqua Zilents
Please ignore the filthy keyboard, it's been on a shelf for a minute.
Nov 15, 2024
Kyle-L
How to sell things on Drop & How Drop charge them?
Hi , this Kyle from China. Since a month ago, my team wanted to build a brand to produce the high quality of mechanical keyboard and headset to sell aboard. Now we already got the license to do so, and we can't wait to bring our products to meet everyone. But the products are still in the period of designing, it would take some time :( There are some questions we can't find the ways to solve - how to sell keyboard on Drop, and the details about how Drop charge per product? - Actually I sent an email to Drop Studio for some questions, but I didn't receive the answer.( Drop Studio also mentioned that they can contact me only if they were interested in my design / products ). So I'm here ask for help. If anyone can answer my question, I would really appreciate it :)
Nov 14, 2024


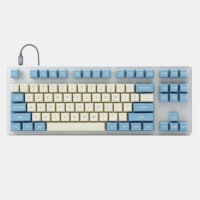


In the land of Mech Keys, a lot of the “End Game” Keyboards are totally programmable and frequently not a standard layout. There’s a lot that goes into programming a keyboard to be the best layout for you rather than just some layout the creator or a community member made. In this article, I’m going to attempt to explain my thought process and iteration for how I come up with custom layouts and programming. I’ll specifically be looking at the Ortholinear Keyboard “The Planck”, but the same process can be applied to any programmable board, be it the Pn layer on a Poker, and Ergodox, or the Whitefox. This also doesn’t have to apply to programming a keyboard, but also games, and other software. I’ve been remapping app-specific keystrokes for years and years and it can make life much simpler and easier.
Note: A lot of this article will use graphics created on keyboard-layout-editor.com, it’s a great tool for designing and coming up with keyboard layouts as well as sharing them.
Some definitions:
ACCLIMATING TO THE PLANCK When I started using the planck, it had the default keymap layout which looks something like this:
The default layer is represented by the center legend, the raised layer by the top legends, and lower layer by the bottom legends. It’s the default layout for all planck keyboards. The first thing you’ll notice if you’re not familiar with the Planck, is it’s extremely small and there’s no number row. I spent about a week trying this layout and just getting used to it. I made a lot of little notes about where I’d rather have things or what other functionality I’d like to add. I really do recommend trying utilize the defaults of a layout for as long as you can stand it. There is a lot of time and care devoted to setting it up originally, but at the end of the day it’s their layout and it’s now your keyboard.
MAKING IT MY OWN The first thing I did was break out the layers into individual “keyboards” on the Keyboard Layout Editor so I can better visualize the layers when programming the board in Jack’s QMK language which is arranged in the layout of the board, per layer. At first I simplified the default layout to 3 layers. Base, Raise, and Lower. I don’t have much interest at this time in Dvorak or Colemak at this time so I dropped those layers and their respective macros. Moving to a simplified 3 layers allowed me to pair down to the ergonomics of what I had and find out what I liked and didn’t like. How many layers you have is a function of how you use your keyboard, and what’s comfortable to you. There’s no right or wrong answer.
BASE LAYER Starting with the Base layer, the standard QWERTY layout, I matched what I had on my keyboard as far as keys go. It’s the layer that you should be placing delineated keys based on (not that you really have to, use blanks it’s fun too). I’ve highlighted the changes that I made compared to Jack’s default layout. My current default looks like this:
- Purple: I really hated where the escape key was, I use tab a lot, and kept miss clicking it, and I don’t program nearly enough to justify where esc was in comparison. Setting it back to a more “standard” layout helped me a lot there.
- Teal: Having the backlight control key all on it’s own seemed like a real waste for how infrequently I use it, and for how otherwise efficient the layout is. I do use the Grave and Tilde a lot, as well having some keystrokes bound to it so I decided to incorporate that onto the primary layer rather than having it buried else where.
- Orange: I reversed the location of the ‘Raise’ and Lower’ keys for reasons I’ll soon elaborate on. Strictly speaking this wasn’t necessary but I felt like swapping keys rather than renaming the layers so it’s obvious to others used to the planck which layer is which.
For the most part, the primary layer is the same as Jacks, there’s only so much modification that can be done and still retain a QWERTY layout with functions/modifiers around the edge. Some people have swapped those into the center, a layout I have yet to try, but none the less it’s still basically the same.RAISE Here’s where stuff starts getting really different Originally I left this layer mostly alone, and still kept the raise key on the right. The more I used my planck the more I really wished I could access all my numbers 1 handed, specifically my left hand. My right hand frequently is using the trackpad/mouse, and especially when going through and doing minor numerical adjustments in some config some where this was key. So this philosophy of access is what forced my change of sides for the raise/lower keys. I’ve also dropped the F-keys from this layer as I didn’t have room. Again, this entire layer was designed based on my need for easy access to numbers.
- Purple: Caps lock is the foul beast that haunts the internet, so I banished it to this layer. A cruel necessity, but infrequently used, it can be turned on and off from the raise layer.
- Orange: I like page nav keys, they’re useful, I have them mapped the same way they are on an Apple keyboard when using the fn key.
- Teal: So this is where stuff got weird. Even with raise moved under my left thumb, it’s still hard to access 8,9,0. I decided to use the 3x3 dial pad grid as it lined up with the existing 1,2,3 keys perfectly. Adding 0 was obvious and the . was just a step of convince I ran into after doing a ton of expense reporting. I’m almost to the point of dropping the rest of the number row. I’m honestly not sure about it as I do use it while typing, but the mixture of both often leads to momentary hesitation slowing down my typing.
This layer is probably the farthest departure I had from the “original” layout. Born from necessities and the way I use my keyboard at work everyday. Again, what works for me, might not work for you. When I first came up with this pseudo-numpad, It was on it’s own layer. This was my first time adding a layer, but it really was just for a numpad. It was configured in defending fashion like a standard numbed, and frankly it wasn’t that helpful. I had set the layer as a lock layer as well, but it seemed inefficient. I removed the layer and shifted to this current layout.LOWER This layer is pretty unchanged as well with two minor adjustments:
- Purple: A Delete key for forward deleting. Very handy to have.
- Teal: A mute key, who doesn’t love a mute key?!?
Originally I had a lot of other macros on this layer, but found I either hit them frequently by mistake or wanted to adjust their position in a way that wouldn’t fit this layout. This drove me to create the next and final (for now) layer.MACRO/FUNCTION/LOCK LAYER. One of the great things about the QMK and TMK keyboard language is the ability to have one key do something on a quick press, and something totally different when held. I took an idea that a surfaced, I believe, on Geek Hack first, but user spicebar in late 2013; the concept is called SpaceFN https://geekhack.org/index.php?topic=51069. We all have Space bars, and we only ever tap them. We never hold them. They take up a ton of room (even on my tiny planck). Why not better utilize this space (pun intended) that is already perfectly placed for either thumb to access it. So I created a SpaceFN layer of my own. You can see it here:
The first thing that I added here were all the macros that had lived in other places. Then I continued to build out other keys and other macros.
CONCLUSION So it’s been a month or 2, I love my planck, it’s great. It does what I want when I want how I’m comfortable. Adjusting any of these a little here or there is a 2–3 min project and I’m ready to keep going. Again the most important part of this article, isn’t what my layout is, but understanding how I made it mine, so you can make your keyboard yours. This community, this desire for custom doesn’t have to stop at what % your board is, or what switches you have. The mech keys movement is predicated on making a tool we use everyday more enjoyable, and less hassle.
My layout can be found here: http://www.keyboard-layout-editor.com/#/gists/f222ccfe2a6d1b23b74456f605ad4174