Click to view our Accessibility Statement or contact us with accessibility-related questions


How to Configure your Drop Keyboard!

search
close
Sort by: Newest
keyboard_arrow_downjxliu
1271
Engineer
Aug 5, 2022
Stickied
Hi all, we’ve made more firmware updates to the Modern version which we think will resolve all of the reported issues of the keyboard not turning on after PC start-up/restart. The Modern firmware version is also now available for SHIFT and Carina.
Please recompile using our web configurator ( https://drop.com/mechanical-keyboards/configurator ) and flash your keyboard again.
If you manually compile your own firmware, you can get the updated code here: https://github.com/Massdrop/qmk_firmware/tree/feature/riot_xap . As of August 2022, that branch has features and keyboard support that have not yet merged to the main QMK repository, specifically SAMD51 support using RIOT-OS and the QMK XAP API.
For flashing your keyboard, we have released a new desktop application to streamline the process. See the new “Flashing Your Keyboard” above.
(Edited)

frooddude
0
Oct 24, 2023
Well, that was dumb. Had a pending kernel update so whatever magic was supposed to happen didn't. Curious that there were no errors logged, but oh well. It's done and works.

iy_c
28
Nov 24, 2023
jxliuHello, and thank you for continuing to work on this. I only found this update just today, and previously I've making my own configuration for the Carina I own through the Massdrop QMK fork (https://github.com/Massdrop/qmk_firmware).
I tried flashing the "VIA" firmware from the new Keyboard Configurator application, and while the flash does succeed with a functioning keyboard, it does not get recognized in VIA even after loading the .json design file.
I then tried to flash the "XAP" firmware, which also works, and the configuration works. While it is not as UI-friendly as VIA, it does the job, and I look forward to it maturing to its full potential.
I do have one feedback/simple feature request -- would it be possible to add a "Enter your own keycode" option for setting a key? I enjoy using QK_GESC (QK_GRAVE_ESCAPE) in my keymapping, but it has not been included in Drop's web-based configurator as well as this new application. It was a big reason why I had been building my own keymaps until now, and it would be really great if it gets added as a feature (VIA has this option).
Thank you so much!
(Edited)

YanboWu
8552
Collaborations
Sep 30, 2024
Stickied
For those of you looking for info on how to assemble your CSTM80 keyboard. You can check out the build guide here.
Onederbread
0
Oct 18, 2024
I have the CSTM 80 and I've downloaded the software for windows but I can't get the software to open

lolskilled
1
Oct 9, 2024
My keyboard is locked to red LED and not recognizable in Drop Configurator App. Cannot even reset to stop QMK...
Anyone knows what else to do?
(Edited)

YanboWu
8552
Collaborations
Oct 11, 2024
lolskilledYou can try boot-magic and wiping the memory.
- Unplug your keyboard
- Hold down the ESC key
- Re-plug-in the keyboard
- Let go of ESC
ruffed
1
Sep 24, 2024
Drop Keyboard Configurator APP just doesn't start.
(win10 x64. two different machines, hardware and OS versions, with/without keyboard connected)
[event log]
Faulting application name: Drop Keyboard Configurator.exe, version: 24.9.6.0, time stamp: 0x6526cc91
Faulting module name: Drop Keyboard Configurator.exe, version: 24.9.6.0, time stamp: 0x6526cc91
Exception code: 0x80000003
Fault offset: 0x00000000019139c1
Faulting process id: 0x4d1c
Faulting application start time: 0x01db0e5c48d7c308
Faulting application path: C:\Users\Administrator\AppData\Local\Programs\drop-keyboard-configurator\Drop Keyboard Configurator.exe
Faulting module path: C:\Users\Administrator\AppData\Local\Programs\drop-keyboard-configurator\Drop Keyboard Configurator.exe
Report Id: dde00e51-7c25-424c-86c7-bec032b2c177
Faulting package full name:
Faulting package-relative application ID:
(Edited)
ruffed
1
Oct 21, 2024
OnederbreadNope ;)
I know many cases when manufacturers stopped supporting\updating their software. But this is the first time I see a manufacturer releasing a completely non-working software and doesn't even care about that.
The_True_Mop
3
Sep 17, 2024
So great this is awesome, BUT AND A MAJOR BUT HOW THE HELL DO I CHANGE LED COLORS NOW
kitcat25777
1
Jul 16, 2024
I can't figure out how to turn off the LED for the DROP SIGNATURE SERIES EMERALD GARDEN KEYBOARD. I pressed fn + Q and it doesn't work. The other shortcuts don't work either.

YanboWu
8552
Collaborations
Oct 11, 2024
isr18858Hey @kitcat25777 @isr18858 sorry I saw your question pretty late here. Try using the key two to the right of the space bar (says super) + Q and see if that does the trick?
djspacewhale
30
Jul 2, 2024
I just got a CSTM65 today and would like to tinker with the configurator to change RGB, keymaps (if anyone has a favorite layout for US-INTL input I'd love to see!), etc, but on downloading it fails to run at all and has been stuck "not responding" for hours now. The keyboard itself works fine and I quite like the feel of the whole thing, but don't know where troubleshooting for the app can be found...?

bruncky
1
Jun 24, 2024
Hello, everyone!
I'm here to provide you with a more recent comment on a current issue (the last comment mentioning it was sometime last year). If you're getting an error similar to
`C:\Users\<your_first_name> is not recognized as a command`
it's most likely because you have spaces in your username, so the configurator can't handle the path to the executable it's trying to run. @jxliu mentioned somewhere that this was fixed, but I can confirm that, as of 24.06.2024, it wasn't. I'm not hating on anyone, I'm just stating that it wasn't fixed yet.
Instead, do it the old way: Head to Drop's repo on GitHub and use the `mdloader` to flash your keyboard.
Cheers
kjh2kj3h
2
Dec 17, 2024
brunckyWere you able to flat the CTRL v2 with mdloader? Did you have to do anything special to get it to work?
Reports on Github suggest that mdloader doesn't work with the CTRL v2. https://github.com/Massdrop/mdloader/issues/85

bakanafish
0
May 28, 2024
I recently acquired DROP ALT V1 from the massdrop era. After installing QMK XAP firmware and changing the keymap, the keyboard flashes and then stops working properly. So I switched to the "original" version, selected that firmware from "Choose file..." and flashed it, and the problem was resolved. However, even after I turn off my PC, the keyboard LED remains lit.After repeating Fn+x many times, the light finally goes out. Is there a way to turn off the LED at the same time as turning off the PC?Showing 32 of 403
PRODUCTS YOU MAY LIKE
Trending Posts in Mechanical Keyboards
The-Cindy
This is easily my new favorite keeb
The IDOBAO ID80 Crystal Gasket Keyboard Kit is a standout choice for mechanical keyboard enthusiasts seeking both aesthetics and performance. Its transparent acrylic case beautifully showcases the...
Dec 20, 2024
Squizzle
Keyboard & Drink
Shine-Through LOTR Keycaps Concept
Would anyone else be interested in a shine-through set of LOTR keycaps? Imagine a glowing black speech keycap set that seduces like the one ring. Perhaps the pale blue moonlight glow of the elven...
Dec 20, 2024
Akofena
Are shipments to Argentina safe?
I want to buy a keyboard with some keycaps ! but i live in argentina. ty
Dec 17, 2024

tbui
Absolutely stunning
The colors really pop on a white board. Easily one of the best caps I own!
Dec 17, 2024
bobbibeer1976
False Advertising BEWARE
This company should be ashamed of themselves. Advertising to young people who save all their money and want nothing more than a keyboard and advertise to them that it is in stock and will be shipped asap and they will arrive before Christmas. Only to "ship" and package and get their hopes up and it arrives and there is no keyboard in the package. Then to get on the website and it isn't even going to ship until January. This happens AFTER you have received their money and made promises that it was arriving, on it 's way, etc! Shame Shame on you!!!
Dec 16, 2024

EuclideanGambit
Closest profile to MT3
I really enjoy the MT3 profile, it has actually become kind of difficult to type on other profiles. So I was looking for some that might be close and noticed the SA profile. I was wondering if there were anymore that were close to it. This would open my options significantly when shopping around.
Dec 15, 2024

tbui
Displaying my DCD Lunar New Year set (Max)
Enough for a full base kit plus novelties, just gotta watch the ample space on top when moving/tilting and near the edges it gets tight so the caps don't fit in as smoothly.
Dec 15, 2024

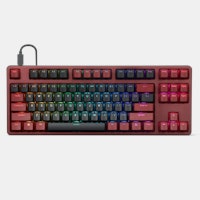
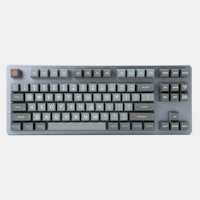
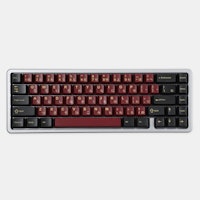
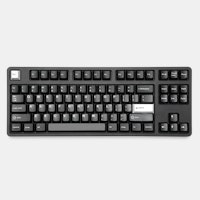

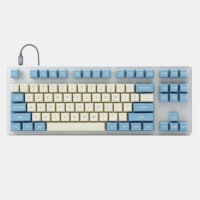


THE BASICS
Default Hot Keys - All Drop V2 keyboards, SENSE75, and CSTM80 Hold FN + listed keys to activate LED Keys
Fn + W: LED Brightness Increase Fn + S: LED Brightness Decrease Fn + E: LED Animation Speed Increase Fn + D: LED Animation Speed Decrease Fn + R: LED Hue Increase Fn + F: LED Hue Decrease Fn + T: LED Saturation Increase Fn + G: LED Saturation Decrease Fn + Q: LED Toggle (All, Keys, Edge, Off) Fn + A: LED Next Pattern Fn + Z: LED Mono Color Mode Fn + X: LED Breathing Effect Fn + C: LED Rainbow Mode Fn + V: LED Rainbow Pinwheel Mode Keyboard Option Keys
Fn + N: Toggle keyboard 6KRO/NKRO (Default state 6KRO) Fn + LCtrl + O: Windows / Mac OS Swap (System / Alt location change) Fn + LCtrl + |\: LCtrl / Capslock Swap Fn + LCtrl + Backspace: Reset Keyboard Default Hot Keys - All Drop V1 Keyboards Hold FN + listed keys to activate LED Keys
Fn + A: LED Pattern - Select previous Fn + D: LED Pattern - Select next Fn + Q: LED Pattern - Decrease scrolling speed (for animating patterns) Fn + E: LED Pattern - Increase scrolling speed (for animating patterns) Fn + Caps Lock: LED Pattern - Change scrolling direction (left to right, right to left, bottom to top, top to bottom, radial center to edge, radial edge to center) Fn + W: LED - Increase brightness Fn + S: LED - Decrease brightness Fn + Tab: LED - Toggle breathing effect Fn + X: LED - Toggle all LEDs off/on Fn + Z: LED - Toggle mode (keys + edge, keys only, edge only, all off) Fn + R: LED - Increase brightness of edge LEDs only (up to brightness of keys LEDs) Fn + F: LED - Decrease brightness of edge LEDs only Fn + V: LED - Toggle every other edge LED off Media Keys
Fn + Page Up: Volume Up Fn + Page Down: Volume Down Fn + Print: Mute Fn + Insert: Play/Pause Fn + Home: Stop Fn + Delete: Previous Fn + End: Next Keyboard Option Keys
Fn + N: Toggle keyboard 6KRO/NKRO (Default state 6KRO) Flashing
Fn + B (hold for three seconds then release): Put keyboard into firmware flashing mode (also referred to as “resetting the keyboard”)
CONFIGURING YOUR KEYBOARD 1. Download the Drop Keyboard Configurator application.
- If you use Windows, download here.
- If you use a Mac, download here.
2. Launch the Drop Keyboard Configurator application. After the application launches, make sure your keyboard is identified and then click Configure Keyboard. If you are using a CTRL V2, ALT V2, or SHIFT V2 keyboard, your keyboard will be recognized right out of the box. If you are using a SENSE75, CTRL V1, ALT V1, or SHIFT V1, first go to the "FLASHING YOUR KEYBOARD" section below."- By default the keyboard will be set to Advanced mode with no safeguards. Remember with layers to always create ways to return to your home layer
- Momentary mode is also available for those looking for some customization with guardrails.
- Remember Boot Magic is always available to wipe your EEPROM and reset the keyboard back to factory settings.
- You can access Boot Magic by holding down the ESC key while your keyboard is disconnected.
- While holding down the ESC key, plug in your keyboard.
Once connected you can let go of the ESC key and the keyboard should be reset.FLASHING YOUR KEYBOARD 1. Launch the Drop Keyboard Configurator application. After the application launches, click “Flash Firmware”.
For CTRL V1, ALT V1, SHIFT V1 users that would like to continue using the older web-based configurator, see instructions here.