Click to view our Accessibility Statement or contact us with accessibility-related questions


How to make custom cable adapter for DT 177X GO

search
close
Sort by: Newest
keyboard_arrow_downrslatara
287
Jun 27, 2020
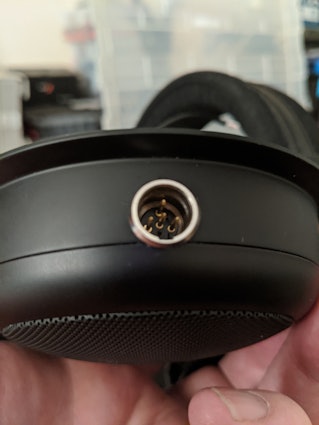
I wonder why they didn't go with the regular XLR pin layout to match the big one.
Thanks for this as I modded a 880 600 to match a 177x as I might eventually get one and have the ability to interchange the cables.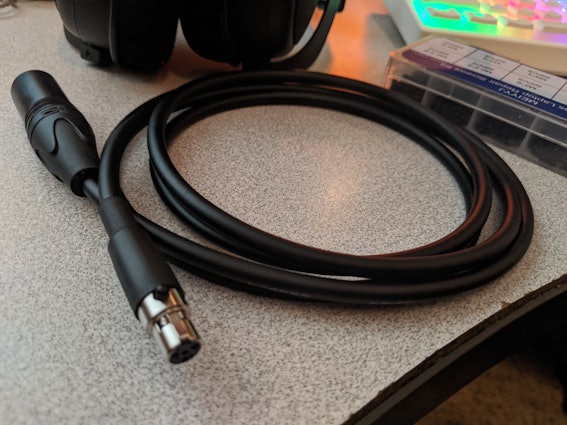
(Edited)
DeepSpaceus
73
May 1, 2020
ridhuankimThat is awesome. Thank you so much. Been wanting to do this for a while (I have both a DT1990 and the DT177x).
GingerGroove
1
May 1, 2020
Looks great imo. You could try to add some heat-shrink to the cabels to clean it up slightly.
PRODUCTS YOU MAY LIKE
Trending Posts in Audiophile

AntonetteCBak
Tips for Setting Up a Trading Desk with a Laptop
Creating an efficient and organized trading desk with just a Best laptops for trading requires a strategic approach to maximize productivity and trading success. Whether you’re a beginner or a seasoned trader, having the right setup ensures seamless execution of trades, minimizes errors, and keeps you focused. Below are essential tips to set up a professional trading desk using a laptop. Invest in a high-performance laptop tailored to trading needs. Opt for a model with a fast processor (e.g., Intel i7 or AMD Ryzen 7), at least 16GB of RAM, and a solid-state drive (SSD) for quick data access. Ensure the laptop has multiple ports for connecting peripherals and a high-resolution display for crisp chart visibility. Trading often involves monitoring multiple charts, news feeds, and trading platforms simultaneously. Connect your laptop to external monitors using HDMI or USB-C ports to expand your workspace. Dual or triple monitor setups allow for better multitasking and a...
Nov 21, 2024
abhinavkumar
Company Information in Dubai
Get comprehensive company information in Dubai, including registration requirements, licensing options, and compliance guidelines. Whether you’re exploring free zones, mainland, or offshore setups, our expert resources provide insights to help you make informed business decisions. Navigate Dubai’s business landscape with clarity, from legal requirements to operational support for a successful establishment. For more details:- https://leelainternational.com/
Nov 21, 2024
Leafwise
Show off your carry / bag / case / setup for your Head-Fi gear ✨
As subject, what do y'all carry your gear in for out-and-about/day-to-day and then for travel, if anything other than pockets?
Nov 19, 2024
keegu22
More bass!
I currently have the the HD 6XX, which sound great but, I'm am looking to upgrade the power of the bass as i really enjoy punchy low end EDM music. Any suggestions in the $200-$300 price range would be awesome.
Nov 13, 2024
danielj9
Trying to add Topping LA90D amp to Topping A9D preamp
Any help would be appreciated...I added an amp to my streamer, dac, headphone amp/preamp system and am now not getting any music through the headphone jacks on the preamp - the specifics: Wiim Pro Plus - optical connection to - Topping D50 iii dac - TSR to XLR connection to - Topping A9D headphone amp/preamp (all worked fine as a headphone amp until I tried adding:) - XLR connection to - Topping LA90 D amp. Amp switches are set to bypass, stereo, low gain. In this configuration, I am not getting any music to either my SE or XLR headphone jacks. I made sure I switched the A9D to "preamp" and "xlr" modes. I have no idea what I might be overlooking or missing...any thoughts would be deeply appreciated! Thank you.
Nov 11, 2024
Tremuh
Trying to find new headset
I currently am rocking the beyerdynamic DT 990 Pros and have been for a while now, along with a go xlr! I was trying to see what other headset you guys recommend along with something to replace the xlr? Thank you!
Nov 7, 2024
aiden.miller
Mic not working pc38x
I just got my pc38x in the mail today and the out put is quiet but fine and I'm happy. But the mic will not work when on my Xbox series and I was wondering if this issue can be resolved or if the head set is not compatible with Xbox.
Nov 4, 2024
Drop Refurbished
Like-new products you can trustDrop Rewards
Get $5 for every 500 points you earn! Learn more
Drop Keyboard Club
Become a member and expand your keycap collectionFollow Drop
https://www.ebay.com.au/itm/BravoPro-TA4F-4-pin-Connector-for-Shure-Wireless-Systems-Black/303298557896
1 x 3.5mm Female TRS Connector
https://www.ebay.com.au/itm/3-5mm-1-8-Female-TRS-Connector-Stereo-Audio-Jack-Plug-Yongsheng-YS240/253298977219
3 x Breadboard cables (Any cable would do. The length of this is just perfect. Just remove the pin tip at both ends and you are ready to go) 1 x Tin Lead Rosin Core (Soldering Wire) 1 x 60W Solder (Higher Watt is not recommended) 1 x Heat Shrink Tube (The size and length will depend on your cable)