Click to view our Accessibility Statement or contact us with accessibility-related questions

83% would recommend to a friend 


Assembly It came with no assembly instruction. No 4x6 paper. No online instruction. It took me a couple wrong turns until I was able to put it together. In the discussion, I saw a few other members struggling, and I offered a brief instruction. Not a single word from neither the collaborator nor the producer for a next a few days. Even after I replied to the producer that he should have included the assembly instruction, neither of them took any action for another a few days. How hard was it to provide that the finally posted sticky post with the instruction? The delivery took more than 5 months. Both the assembly issue and my second issue below should all been addressed during that 5 months.
Layout Configuration This keyboard was sold as fully configurable. And, it's one of its selling points. I tried at least 4 hours using the GMK tools without a success. It's a joke! From the discussions I read, some people were successful with GMK tools and others had to use another tool. Just today, I read another member in the review section suggesting to try the hardware flash button instead (which I haven't tried it yet). Sure, those of you who been through this type of troubleshoot many times and even know how to code such a thing yourself will say - every keyboard is same it's not that easy and laugh. This is only my second time I tried to configure my keyboard layout. So, I'm a novice - and there is nothing wrong with it right? So, just stop saying nay words guys. My other experience was the first Massdrop made mechanical keyboard. It was a buggy hell, but at least the configurator worked for me. The GMK tools did not even have the default Tokyo60 layout - just because collaborator/producer did not upload it - which would have taken them 15 mins a top. It took me at least 40 mins to figure out what to do with non existent Fn key layout!! - which could been avoided if the default layout was available. I am not a computer science major, but I had a few programming classes. So, good luck if anyone wants to configure this keyboard. You may be able to pull it through in no time or stuck like me for hours and hours for nothing. This really is a joke! What's worst? What is either the collaborator or producer doing? They are totally silent the configuration issues. I know you put the like button on the positive things I've posted. What about the actual issues people need your support for?
Other Support Issue One of my switches split open in half when trying to re-cap. I contacted MD support and they forward it to a specialist - which I suppose is either the collaborator or producer. It's been more than a week. Not a single word. The support around this drop has been my worst experience with MD so far. Edit - shortly after I posted the review, I was contacted by MD offering a replacement unit.
I think 3 star balances out my love for the keyboard itself and the non-existent support I'm getting with this keyboard. After all, it is not configurable for me, which defeats the purpose I got this keyboard at the first place.


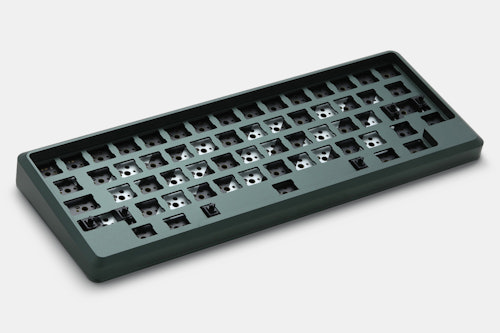
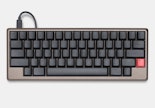
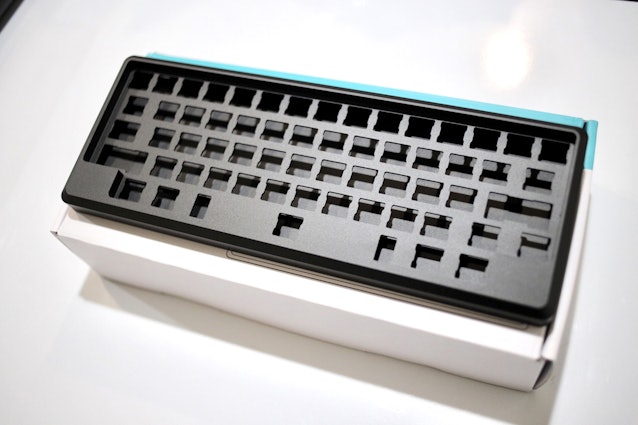
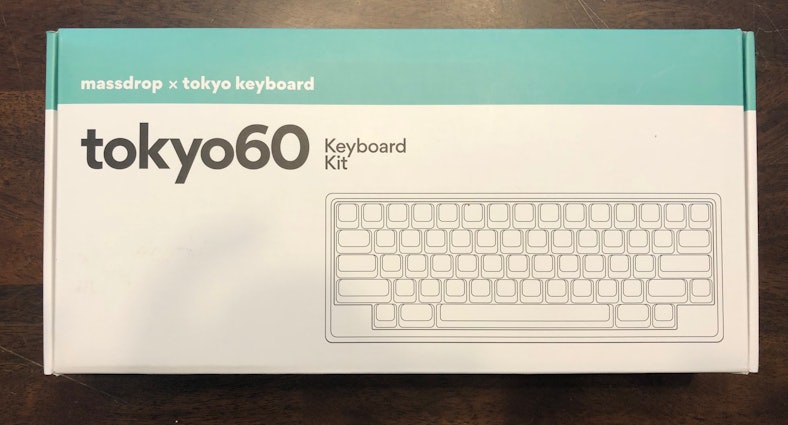
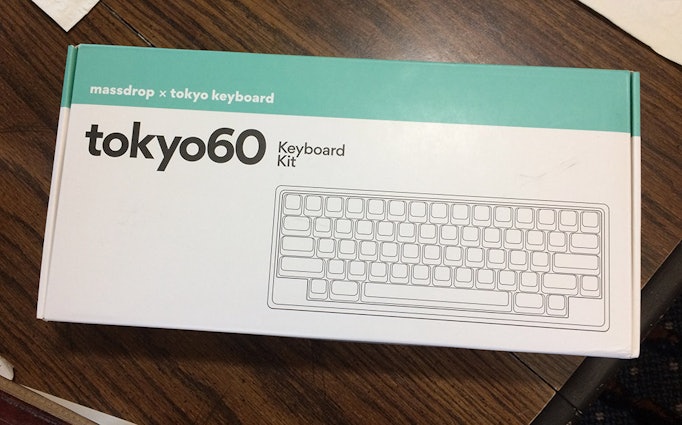
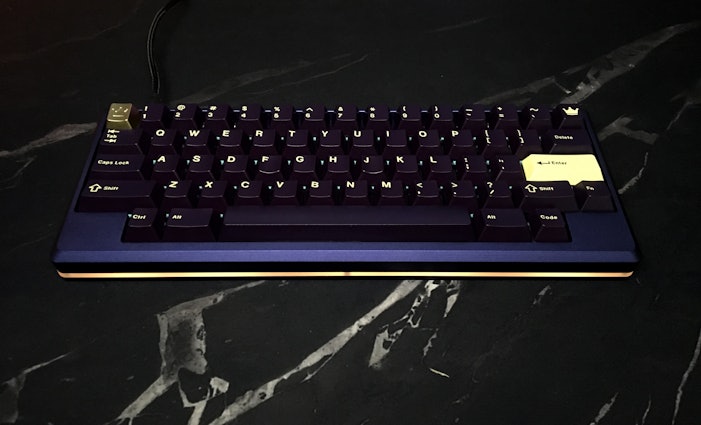
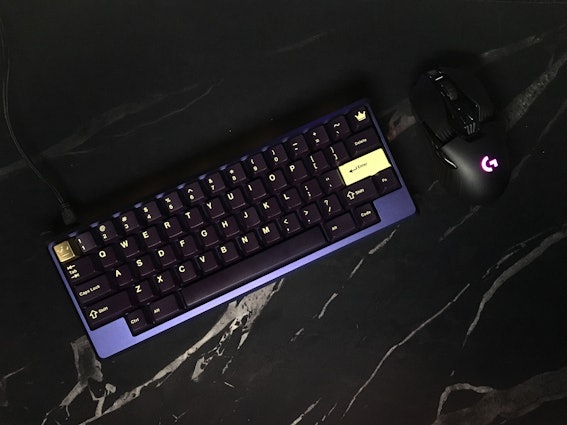
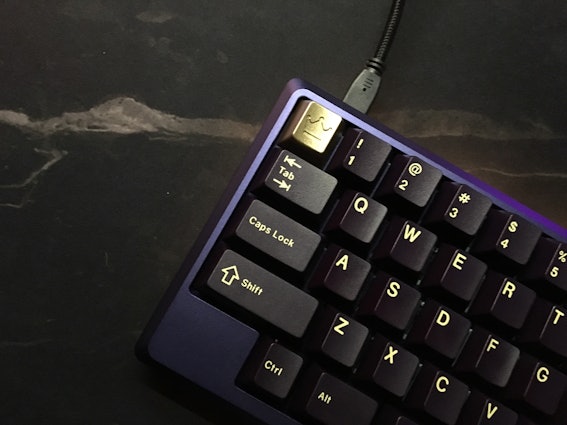
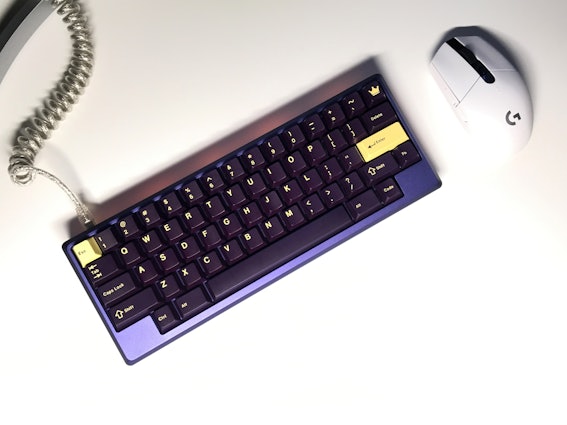
Drop + Tokyo Keyboard Tokyo60 Keyboard Kit
$160
01 / 16
Drop + Tokyo Keyboard Tokyo60 Keyboard Kit
bookmark_border
$160
Ready to Ship
·
Free Returns in USA
●
Members who purchase earn
480
Drop Rewards
Product Highlights:
Frequently bought together:
.jpg?auto=format&fm=jpg&fit=clamp&w=155&h=108&dpr=1&q=70)
Customer Reviews
4.2
(527 reviews)
5star(243)
4star(185)
3star(59)
2star(24)
1star(16)
By Feature
Sound
SilentLoud
Feel
StiffFlexible
Build Quality
4.5
(22)
ActivitiesPopular among reviewers
Paired SwitchPopular among reviewers
search
close
Images
keyboard_arrow_downSort by: Top Reviews
keyboard_arrow_downcopper_wasp
65
Apr 17, 2020
checkVerified Buyer
A 5 star kit if you come in with the right expectations
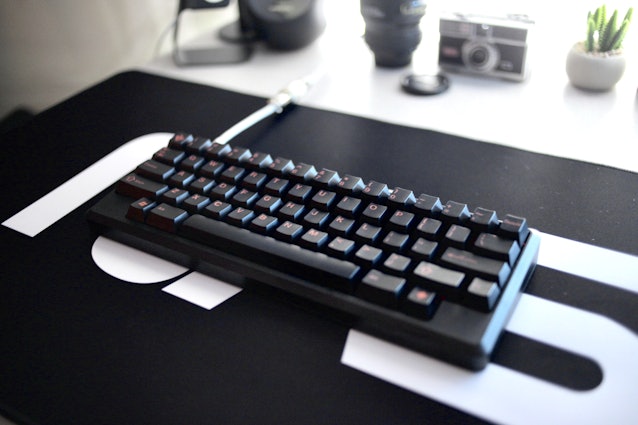
I’m in love with my Tokyo60. Fortunately I was lucky enough to get a PCB with absolutely zero problems, so this review is based upon that fact.
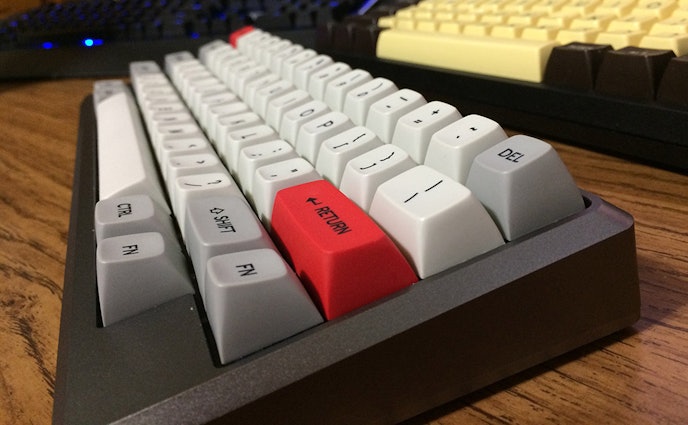
As others have said, there were no instructions included, but it’s very easy to figure out, and the instructions are easy to find online. Assembly was a breeze. If you’ve done any of the KBDfans kits or even the cheap GK61 kit from Amazon or Aliexpress, this should be no problem for you.
The case is sturdy and mine had no visual imperfections. Now, I do recommend some type of case filler, whether that be foam or shelf liner or whatever. I see that some people took away stars for this, but honestly, even if I bought a $500 case I would expect to probably use a little bit of shelf liner, but maybe that’s just me. Not worth taking away stars, in my opinion.
I feel similarly about the stabilizers. Before buying, I saw others saying that the stock stabs are garbage, so I ordered Cherry stabs from Novelkeys. I recommend you do the same if you’re looking to buy this.
This is my first board that can utilize QMK, so learning how to flash and apply my own key map took about 20 minutes, but it’s really not hard. Mechmerlin on YouTube has some great videos on how to do this.
Overall, an amazing kit that I am very happy to have added to my collection. 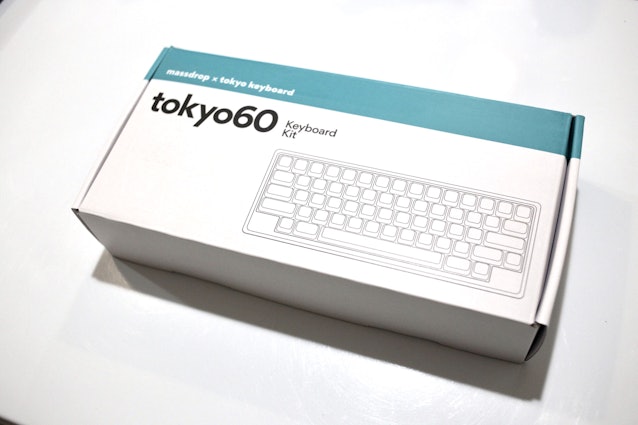
Recommends this product? Yes
Abramrodriguez
10
Apr 20, 2020
checkVerified Buyer
I love this board it literally my favorite
Having this type of board gives me many options on switches I love it some much it’s so clean and it looks great on my set up
i do wish the blue was a little lighter but who does like dark blue it matches with everything mostly 
Recommends this product? Yes
Sleepybeats
72
Apr 20, 2020
checkVerified Buyer
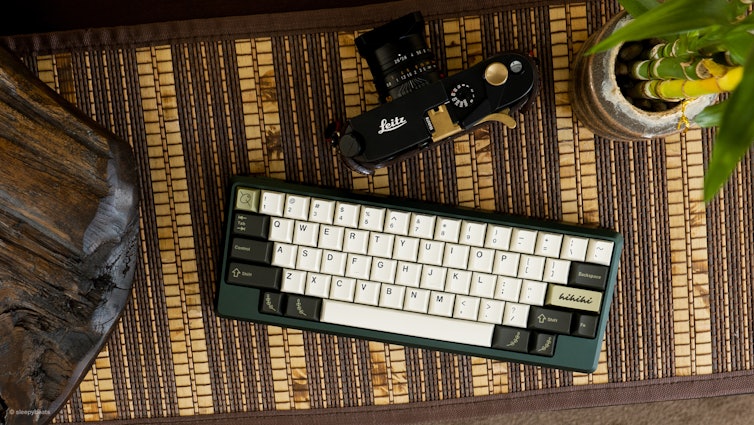
Current Build:
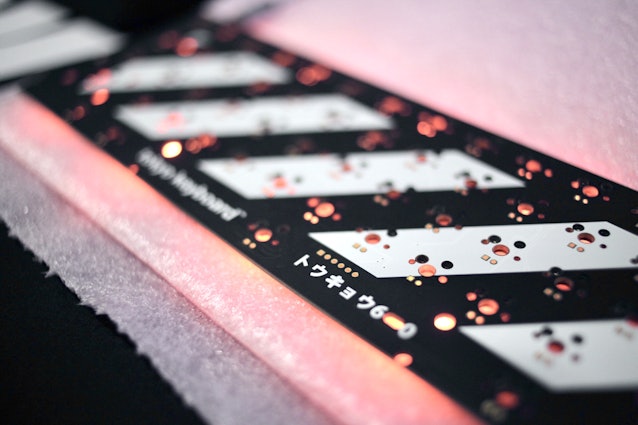
Tokyo60 v3 - Gyoen Green - Barebones Kit
Zeal PC Healios V2 Silent Linear 67g Switches lubed with Krytox 205g0
Durock Stabilizers
GMK Olive Keycap Set + Rama Artisan ‘hihihi’ enter key
Review:
The Tokyo60 us an incredible value for its price.
a e s t h e t i c s
The CNC job on the case is excellent, but a few minor machining marks are visible near the screw holes. Its not a big deal breaker because the screws cover up the marks and these flaws are expected at this price point. The anodization is also quite well and consistent, no blotchyness or streaking present. The Beveling is quite sharp and could use a smoother edges. The weight is impressive for its size, perfect for everyday carry. It comes out to 3ish or so lbs when fully built.
BUILD
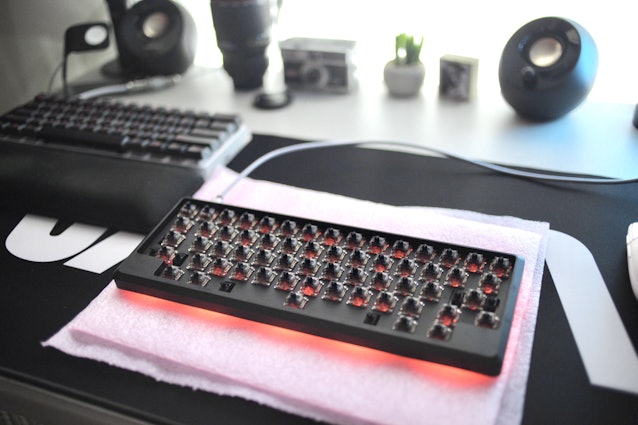
Building the Tokyo60 was simple and took less than an hour to put together (considering you lubed your switches beforehand). You can’t go wrong with a hotswap PCB and makes for a great first custom keyboard. However, I recommend not switching out your switches more than 100 times (probably less) due to how Kailh hotswap sockets are made. They get looser overtime and eventually fail. With that said, I would love to see a solderable PCB option in the future.
Pro-tips*
- If you like a dampened sound - When installing the PCB to the integrated plate, i recommend sandwiching your PCB between thin fabric washers (uxcell 2mmx4mmx0.5mm) at the mounting points. These washers can be found on amazon for $6 (100pcs) and also can be used when mounting screw in stabilizers. I find that it dampens the sound a bit.
- If you like a better feeling/sounding stabilized keys - I threw away the stabilizers that came with the kit, they were way too scratchy, even when lubed with Krytox 205g0. I recommend getting genuine GMK, Durock, or C3 stabilizers and using those instead.
- Get the acrylic plate - It’s more for sound dampening. There is little to no room in the case to line the bottom plate with sorbothane or your favorite dampening material. Also, depending on the switches/stabilizers you use, lubed or un-lubed, the reverb is pretty bad without the acrylic plate.
- Plug in your keyboard.
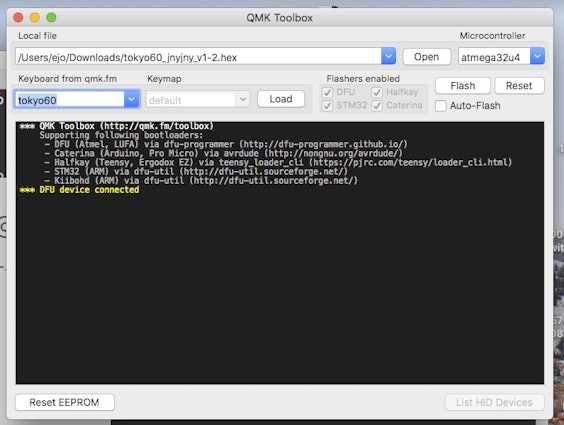
- Download QMK Toolbox
- Go to caniusevia.com to download VIA program & Tokyo60_VIA.hex firmware file
- Open up QMK Toolbox, open up Tokyo60_VIA.hex
- Select ‘atmega32u4’ for the microcontroller
- Press the following keys to enter DFU Mode: L_SHIFT + R_SHIFT + FN + B
- Your Tokyo60 should now be visible in QMK Toolbox.
- Click FLASH
(Edited)
Recommends this product? Yes
THOCKYCAFE
1
Sep 1, 2023
SleepybeatsHi, u think that is still a good keeb in 2023? i wanna buy one, but im waiting for discounts!
JnyJny
72
Aug 31, 2018
checkVerified Buyer
Plot Twist (and a happy ending!):
It's been nearly two years with my Tokyo60s; one at home and the other at work. For the last couple of weeks I've experienced problems with my mouse being jittery but chalked it up to an old mouse showing it's age and replaced it. The jitteriness in the mouse did not improve with a new mouse. Today I noticed that my Tokyo60's USB connection was loose, and upon further inspection I discovered that the USB female port had become desoldered from the PCB! I am heartbroken! I could solder the big pads, but those four thin pads are beyond my soldering skills. Updates to follow.
Update 1: 15 Apr 2020
After interacting with Mass (formerly Massdrop) customer services, I was given the opportunity to buy a replacement PCB (USB-C rev). I accepted their offer and am awaiting delivery of the new PCB. ¯\_(ツ)_/¯
Update 2: 1 May 2020
After some minor difficulties I have installed the new USB-C PCB board and have a working keyboard once again! The difficulties were entirely USB-C cable related, specifically the board would not function with a USB-C to USB-C cable. This apparently is a known issue in the discussion that I was not aware of. After ordering a USB-C to USB-A cable from Amazon I was able to successfully flash the new board with my preferred key map and get back to work. As an aside, using the USB-C to USB-A (male) cable with a USB-A (female) to USB-C cable worked on a USB-C equipped MacBook Pro.
Thank you Massdrop Drop for helping me get back to my happy typing place!
Update 3: 21 Jan 2021 (A Small Defection)
One of my replacement Toyko60 USB-C PCBs developed an intermittent fault where the board would lose connection and go dead and require a unplug/plug cycle to restore function. I spent some time looking for an obvious physical defect, swapped cables, swapped host ports, swapped hosts, and reflashed the board. The board continued to go dead with increasing frequency. It was time for a new PCB. My first idea was to order another Tokyo60 PCB to replace it, however while googling I discovered the 1UP 60% Hotswap Tsangan Edition (1up60hte) PCB which claimed to support HHKB builds. The cost of the board was roughly comparable as was the feature set, so I ordered one to see if it would be a suitable replacement. The short story is yes, the 1up60hte board is a good fit for the Tokyo60 chassis. The board has through holes in all the right places for the top plate mounting screws, the USB-C connector position matches the case's port opening and all the board's hot swappable switch sockets match the top plate's switch openings. The board supports QMK and my board arrived flashed for the Tsangan layout. Flashing the board to a HHKB layout was relatively straightforward, the default config.qmk.fm HHKB layout was "empty" requiring me to assign all the keys. After that the board entered DFU mode when the bottom mounted reset switch was depressed and flashed successfully. My keyboard is back in action however my Tokyo60 purity is compromised. :)
First Impressions
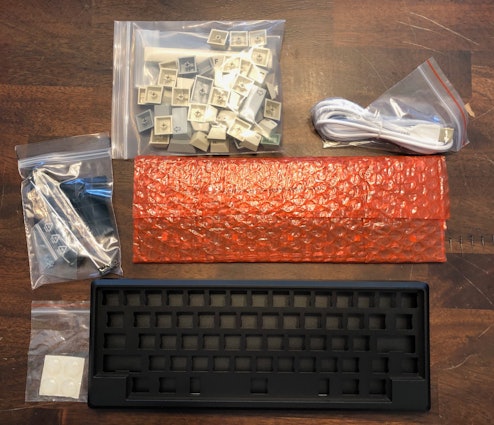
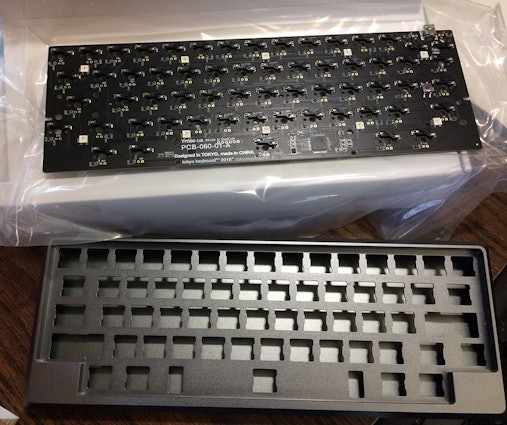
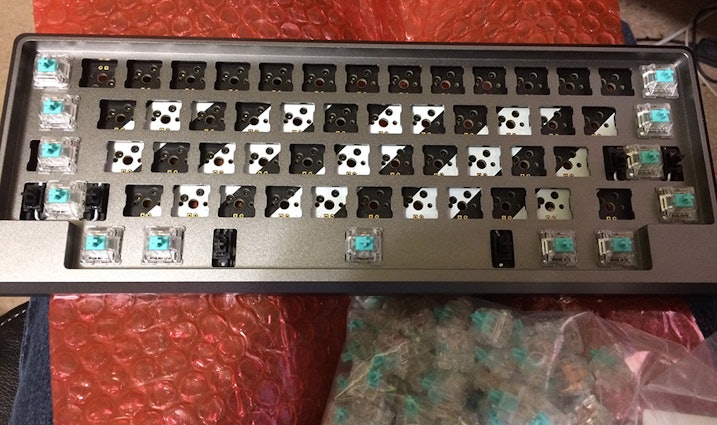
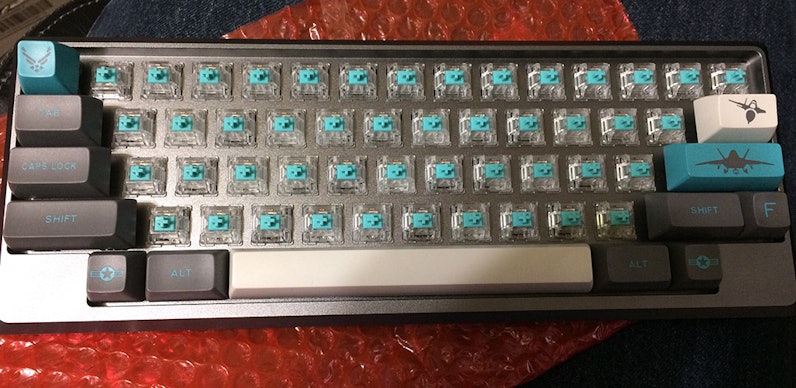
I ordered two kits, Space Grey and Black, and both kits came beautifully packaged and provisioned with all the parts advertised. I could have benefited from some directions; stabilizers first, then mount the PCB on the top plate, install switches and key caps, and then finally put on the bottom plate.
My kit came with 61 keyboard switches and I needed every one of them. This was my first experience with solder-free switch sockets and I had some difficulty with bending the switch legs if they were misaligned. The legs were easy to fix with a needle nose pliers, however I did manage to mess one switch up beyond easy repair.
The cable that came with the kit is nice and fabric wrapped, however it is white in color when I would have preferred black if given a choice.
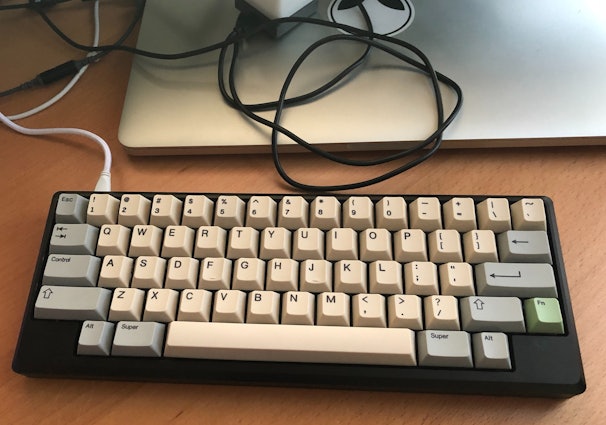
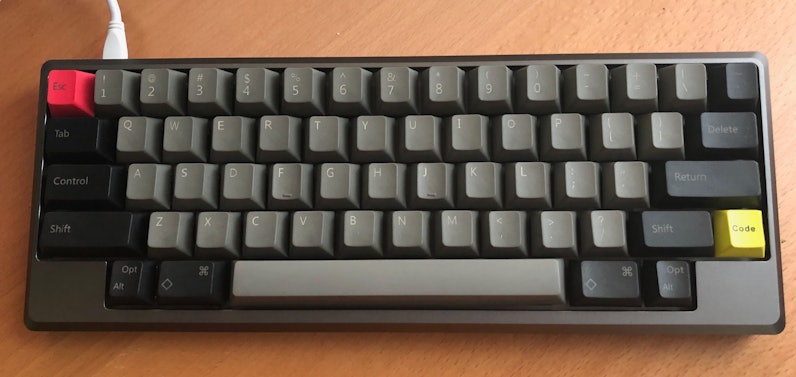
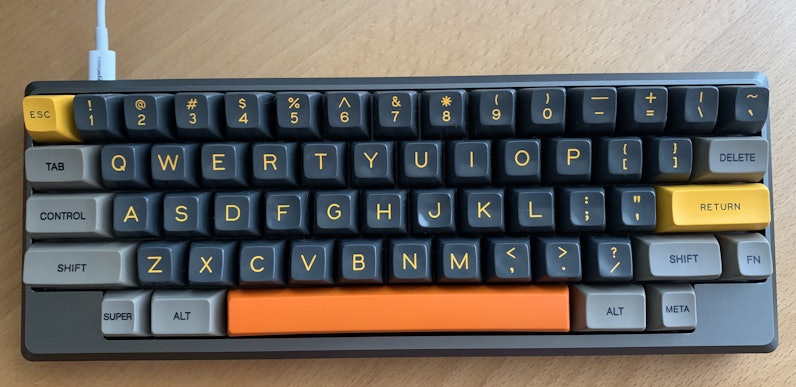
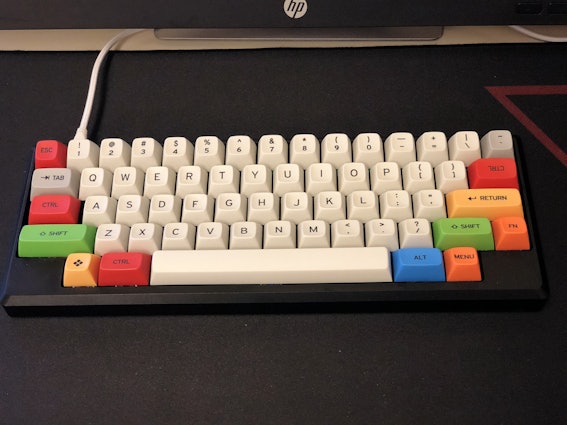
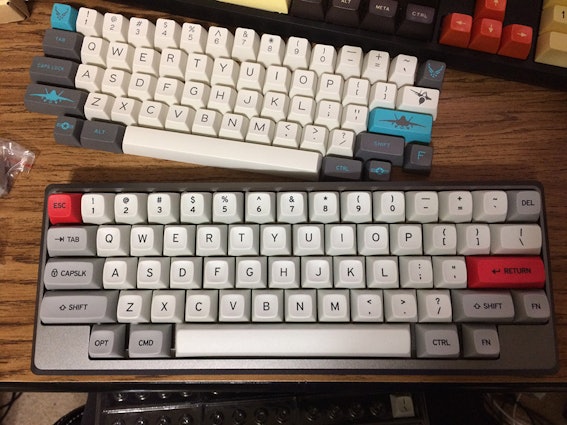
Above: Tokyo60 Space Gray with SA Green Screen (Amber), SA Control Code mods & PBT Orange 7u Spacebar I love these keyboards and I am a very satisfied customer. Thank you @tokyocoffeenerd and @YanboWu!
Above: Tokyo60 Space Gray with SA Green Screen (Amber), SA Control Code mods & PBT Orange 7u Spacebar I love these keyboards and I am a very satisfied customer. Thank you @tokyocoffeenerd and @YanboWu!
(Edited)
tommytripp
49
Sep 23, 2018
JnyJnyBoth boards came out looking great, but I'm particularly jealous of that second one!
hardstyle
0
Mar 3, 2021
JnyJnyHello JnyJny, Do you using VIA(https://caniusevia.com/) application?
I would like to build with RGBLight animation.
Do you have experience?
Starius
703
Oct 1, 2018
checkVerified Buyer
I've waited to write this review until I've had a good amount of time to work with this keyboard - from assembly to configuring to daily usage. I have had a fair amount of time to do all that now, and even though I still feel like I'm just scratching the surface, I wanted to share my thoughts. And for future clarification, this review is based on the Round 1 Tokyo60 in Space Grey.
Now, this isn't directly solely at the Tokyo60, but as a relatively new person to modern enthusiast keyboard kits, I found QMK a bit daunting at first. With the help of some websites and a few youtube videos, I was able to get the hang of it.... but ideally, to make this market more appealing to the uninitiated, it would be nice if there were beginner guide videos on how to get started. Perhaps that's something Massdrop itself could put on their website. On the plus side, again, I feel the Tokyo60 is a great board to get started with QMK due to it's 60% form factor. It forces you to figure out and get used to the layers function relatively quickly to do all the things you're used to doing on a full sized keyboard.
I've been using SA F-22 and MT3 Dev/TTY keycaps on my Tokyo60 so far. But Canvas XDA is what I want on this guy!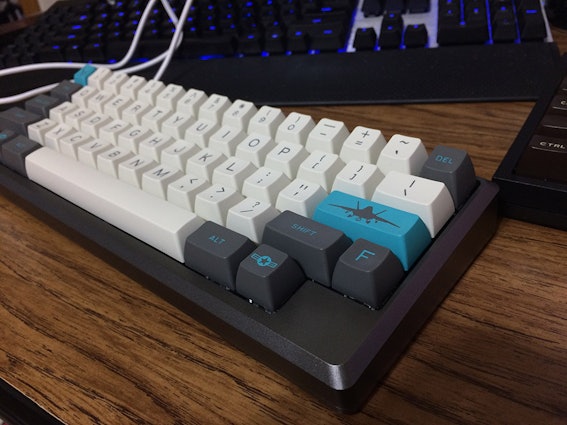
To Summarize, here are some of my final thoughts:
Pros: Easy to Assemble High Quality materials and design No soldering required Comes with a cloth covered USB cable (Though it is white, which may not be your ideal color choice.)
Cons: Assumes you know QMK Doesn't come with key switch puller Box Black switches (This is what I had chosen, long before it was known the stem issue was known. The kit arrived with these same early generation versions, which sadly I won't be using now. )
Tips: In QMK, on a layer create a key combo that will reset the board. This will save you from removing the backplate and hitting the physical button every time you want to make a change in your firmware. (And you're going to make changes as time goes on and different solutions come to you as you use it.) You're going to want to lower the risk of striping out the head of a screw by removing them as little as possible.
Conclusion: Overall, most of my critical issues don't really have to do with the Tokyo60 itself, which is why I'm not docking any stars for them. I feel like the Tokyo60 was designed for people who are "already in the know" in this community, and not for drawing new folks into this community - which is a shame! Because it's almost the perfect board to bring someone into this community - someone who is intrigued by the small form factor or who is even reminded of the old M0110 by it's layout. It's rock solid and it's assembly isn't intimidating. I feel it's only hindrance is not giving you that friendly nudge to get it going out of the gate. But once you do get through that gate, it's a absolute joy to type on.
Starius
703
Oct 3, 2018
Yeah, that's what I've been using thanks to a youtube video I had found. I agree, I think it would be in everyone's best interests if Massdrop offered their own (easy to find) guide on the subject, since so many keyboard products would take advantage of that knowledge.

Lireoec
56
Mar 20, 2020
checkVerified Buyer
Decent Kit But Wouldn't Recommend As First Board
Fortunately I didn't receive a dud board (thought I had a bad left 'Alt' but turns out I just bent the pin during the install). But I would recommend doing plenty of research before jumping into this board if you want to make full use of the layers and ensure that your installation process goes smoothly... A few things to keep in mind for those building this as their first kit (these points should be pinned):
- After some diving, you can find the instructions buried here: http://tokyokeyboard.com/tokyo60-assembly-guide/ but they should really include a printed version of this (at least a small pocketbook or something on recycled paper).
- You can use https://config.qmk.fm/#/tokyo60/LAYOUT_60_hhkb to configure your own layout, ensure you that you have the Left and Right Shift active on the second layer or the bootloader mode command won't work.
- Download qmk_toolbox.exe here https://github.com/qmk/qmk_toolbox/releases/tag/0.0.16 and select "atmega32u4" as the microcontroller.
- If all else fails, there's a purple button that puts the keyboard into bootloader mode once you have QMK Toolbox open.
- Look up a guide on lubing your switches and stabilisers. You'll definitely want to lube and band-aid mod the included stabs.
(Edited)
Recommends this product? Yes

lunias
108
Feb 12, 2020
checkVerified Buyer
It should be said that I loved this keyboard enough to buy it again twice after V2.
My Akira Red V2
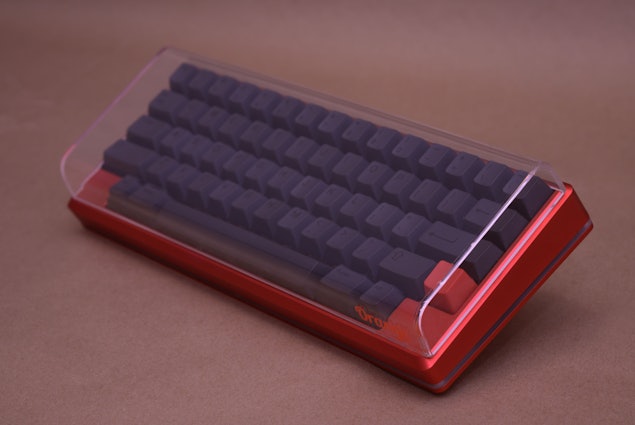
(Edited)
Recommends this product? No
leegeenee
45
Mar 28, 2019
checkVerified Buyer
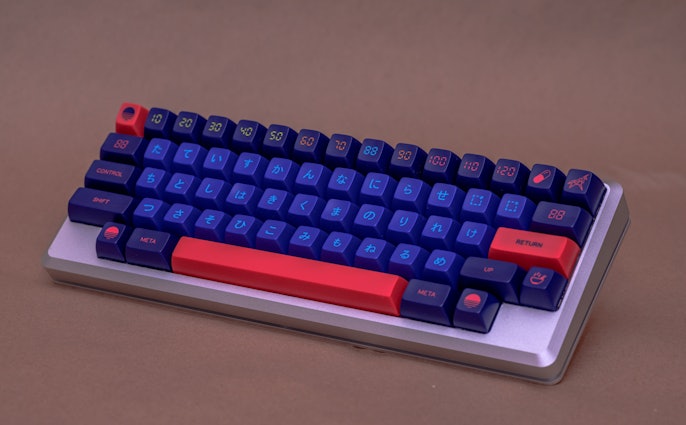
it's more bluish then i expected but overall everything is great


Bepis
15
Mar 1, 2019
checkVerified Buyer
The "ink" color is nowhere near the amazing looking deep purple in the pictures. It is straight up solid blue. Absolutely not what I wanted. I don't even know how you mess that up...
Moonwolf
56
Sep 18, 2018
checkVerified Buyer
Assembly It came with no assembly instruction. No 4x6 paper. No online instruction. It took me a couple wrong turns until I was able to put it together. In the discussion, I saw a few other members struggling, and I offered a brief instruction. Not a single word from neither the collaborator nor the producer for a next a few days. Even after I replied to the producer that he should have included the assembly instruction, neither of them took any action for another a few days. How hard was it to provide that the finally posted sticky post with the instruction? The delivery took more than 5 months. Both the assembly issue and my second issue below should all been addressed during that 5 months.
Layout Configuration This keyboard was sold as fully configurable. And, it's one of its selling points. I tried at least 4 hours using the GMK tools without a success. It's a joke! From the discussions I read, some people were successful with GMK tools and others had to use another tool. Just today, I read another member in the review section suggesting to try the hardware flash button instead (which I haven't tried it yet). Sure, those of you who been through this type of troubleshoot many times and even know how to code such a thing yourself will say - every keyboard is same it's not that easy and laugh. This is only my second time I tried to configure my keyboard layout. So, I'm a novice - and there is nothing wrong with it right? So, just stop saying nay words guys. My other experience was the first Massdrop made mechanical keyboard. It was a buggy hell, but at least the configurator worked for me. The GMK tools did not even have the default Tokyo60 layout - just because collaborator/producer did not upload it - which would have taken them 15 mins a top. It took me at least 40 mins to figure out what to do with non existent Fn key layout!! - which could been avoided if the default layout was available. I am not a computer science major, but I had a few programming classes. So, good luck if anyone wants to configure this keyboard. You may be able to pull it through in no time or stuck like me for hours and hours for nothing. This really is a joke! What's worst? What is either the collaborator or producer doing? They are totally silent the configuration issues. I know you put the like button on the positive things I've posted. What about the actual issues people need your support for?
Other Support Issue One of my switches split open in half when trying to re-cap. I contacted MD support and they forward it to a specialist - which I suppose is either the collaborator or producer. It's been more than a week. Not a single word. The support around this drop has been my worst experience with MD so far. Edit - shortly after I posted the review, I was contacted by MD offering a replacement unit.
I think 3 star balances out my love for the keyboard itself and the non-existent support I'm getting with this keyboard. After all, it is not configurable for me, which defeats the purpose I got this keyboard at the first place.
Zuzechan
5
Sep 23, 2018
I don't think your individual experience and know-how regarding set-up supersedes the matter at hand: support. If a moderately experienced user/enthusiast is having difficultly getting off the ground then that means at least dozens of other customers are having trouble. Accountability is the heart of the issue in this review. You could argue that anyone who got in on this MassDrop is fully capable of researching the issue for him/herself. All the same, producers of drops should just as easily be ready to ensure the success of the drop that they're undoubtedly profiting from. Six hundred and sixty units multiplied by $230 is no small sum. Even factoring in production cost/overhead.
Showing 42 of 769
Recent Activity


Drop Refurbished
Like-new products you can trustDrop Rewards
Get $5 for every 500 points you earn! Learn more
Drop Keyboard Club
Become a member and expand your keycap collectionCollaborate With Us
For Brands & DesignersFollow Drop