Click to view our Accessibility Statement or contact us with accessibility-related questions


Programming KBD Keyboards via Bootmapper Client (TMK guide getting added soon here!)

search
close
Sort by: Newest
keyboard_arrow_down
Odin_De
31
Aug 19, 2020
I know that your post is already a few years old but I have just encountered a big problem.
I accidentally hit "Upload" instead of "Download" right after opening Bootmapper Client and now the keys on the keyboard are not registering anymore. Restarting my PC didn't help.
Did something similar happen to you? Do you know how to fix it?
Thank you

Odin_De
31
Jul 12, 2021
hi mate,
I don't know if this is still relevant to you but I found an easy fix. You just have to check "toggle bootmapper" on the top. Afterwards you can reassign the keys.
samleezh
1
May 30, 2020
Thanks so much for this guide! It really helped me get started with my new keyboard haha. Just wondering, is it possible to have set different underglow lighting schemes so i would be able to identify which layer im in?
DaKeebTypes
0
Nov 13, 2019
Hey guys I've just got my new Alt yesterday and am already having some teething issues with it. Initially I plugged it in to USB 2.0 standard keyboard port on my work desktop. After using it awhile, the keyboard just goes to sleep and the orange light appears at the bottom. What does that mean? And no keystrokes will work after that unless I unplug and replug my keyboard. So I decided to try using USB 3.0 on my desktop. Incase the reason behind it was that the 2.0 wasn't providing enough power to the kB. I left my desk for a moment to chat to someone for around 5-10 mins. When I came back to my desk my CPU went to sleep which is normal, however the keyboard is now showing the orange light at the bottom and doesn't wake up unless I unplug and replug the cable again. Does anyone have experience with this issue? If so please help.
Thanks guys. Happy clacking!
Riskymilk
19
Aug 23, 2019
Im getting the following error :"Error setting action: communication error with device" when i hit the download button
Braveshock
1
Jan 3, 2018
Hi All,
I'm interested in KBD75 keyboards. I'm using MBP with OS and Win10 as well (Boot camp). Could you tell me if there is any option to program this keyboard with two programs - first for Mac OS and second for Win10 and switch them using only two keycaps? Thanks

Paul1
0
Nov 13, 2017
Thanks for your tutorial! I've never programmed a keyboard befor... sorry if this is a stupid question: Can I use a nordic layout with bootmapper too, let's say to use "Umlaute" like äöü? Is it possible to use one key for different functions without changing the layer? For example: Capslock+i for pageUp, Capslock+k for pageDown?

RobotRogue
244
Oct 28, 2017
Anyone who just got the latest round of KBDFans75 boards - I wrote a half-ass "How To" guide to get the keyboard programmed. Find it here - https://docs.google.com/document/d/1USoAn8FIGihK8RNVE1zbtbQ0aKB6MBenvmyz6DUD3qs/edit?usp=sharing

RobotRogue
244
Oct 26, 2017
Has anyone who recently bought a KBDFans75 run into trouble with trying to download the initial keymap? Some of us are running into an error of: "Error opening ps2avrGB device: The specified device was not found"
Chri5
0
Aug 14, 2017
Hi, any chance you can provide me with .hex layout file for the KBD75 for bootmapper? I accidentally deleted my layout pressing upload instead of download. Silly me! Just an brick of aluminium ATM... :(

IAmNewHere
0
Jun 29, 2023
Chri5Six years later maybe you can unbrick that keyboard this way
https://drop.com/talk/1392/talk/2828044?utm_source=linkshare&referer=9SZYJE
Showing 25 of 43
PRODUCTS YOU MAY LIKE
Trending Posts in Mechanical Keyboards

mrockwell
What is a good replacement circuit board?
I spilled on my DROP CSTM80 keyboard and damaged the circuit board. Where can I get a replacement circuit board? The ones on the Drop Shop site do not look the same as the one in my keyboard. Can you please make a recommendation? Thank you.
Oct 25, 2024
ThereminGoatMK
A Few Obscure Keyboard Switch Modifications
Figure 1: Oh yeah, I meant it when I said obscure... There’s no doubt that mechanical keyboard switches have gotten increasingly better in their stock forms over the past half decade of releases. Despite switches now having tighter manufacturing tolerances, smoother factory lubing, and overall higher quality per dollar spent, aftermarket modifications of switches is still one of the most discussed topics by people freshly joining the hobby today. This hyper fixation on switch modding is due in no small part to the glut of keyboard content creators that produced videos, shorts, and all manner of content during the peak of COVID talking about the art and science behind lubing and filming for switches. For a while there, it almost seemed as if you had to have some content about lubing, filming, and/or ‘frankenswitching’ switches if you wanted to cut it as being a true keyboard content creator in the space. However, as people like this have flooded the internet with...
Oct 22, 2024

eclectician
Is the drop alt v1 compatible with the official qmk configurator?
I use a Drop Alt v1 and much prefer flashing with compiled .bin files to using the desktop configurator app. Drop's online configurator has been refusing to compile keymaps, while the QMK online configurator at https://config.qmk.fm/ has keymaps for Alt v2 but not Alt v1. Are the Alt v2 and Alt v1 compatible enough that a .bin file compiled for v2 will work on my v1? Thanks for your help!
Oct 20, 2024
theboudlessvids
Drop CTRL Windows Key Not Working
I have had this keyboard for 3 years and I recently noticed the windows key does not work (I recently actually wanted to use it). I have looked through the keyboard configuator and flashed my keyboard multiple times and it still does not work. The GUI key is programmed but does not work. I am wondering if there is a shortcut I am missing to get it to turn on? Edit: Nevermind I figured it out. The one switch conviently had a bent pin out of all the keys and was not making contact with PCB.
Oct 19, 2024



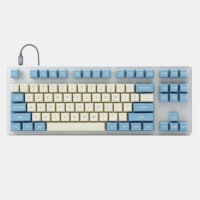


I'm used to paying $350+ for custom aluminum keyboards, but was totally shocked when I received my $160 KDB75. The keyboard was packaged extremely well and arrived from China with no flaws, and weighted far more than I was expecting. It weighs more than my RS96. I never was really into the 75% layout, but I was never into the 96 key layout until I tried it, so I figured I'd give it a try since the price was definitely right.
But enough of the "review" part, lets get on to programming this guy. I always like to do guides because I know that being intimidated by programming a custom can often lead to people skipping buys they would otherwise join. This is a very easy one to program, so nothing to be afraid of here!
The first step is to simply download the Bootmapper client found here: https://www.dropbox.com/s/3bn9flirkb49ahz/BootMapperClient.zip?dl=0
After downloading it and running the .exe (I'm on Windows, there is an OSX version as well) you should see something like this:
Once this is active you will press the key you want to remap, and it should get highlighted in red within the matrix. Simply click on the key you want to change it to from the selection of keys at the bottom. It should look like this, using Caps Lock as an example:
One more very important thing to point out is lighting controls. You will probably want to put these on the normal FN layer. RGB mode controls the SMDs on the PCB for underglow, and LED mode, LED BrUp, LED BrDN only affect in switch LEDs. the LED on/off affects both.
Moving on to lighting!
To access the lighting features (both under PCB SMDs and in-switch LED's) go to Options from the main tab selection. You should see this screen:
Now lets head back to the main tab to flash the new layout to the keyboard. Make sure "ps2avrGB & ps2avrGB_split" is selected as the target: