Click to view our Accessibility Statement or contact us with accessibility-related questions
9% would recommend to a friend 


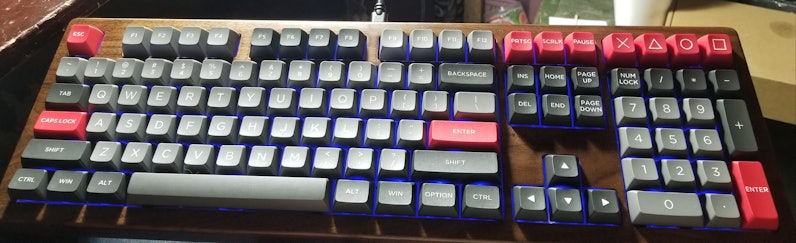


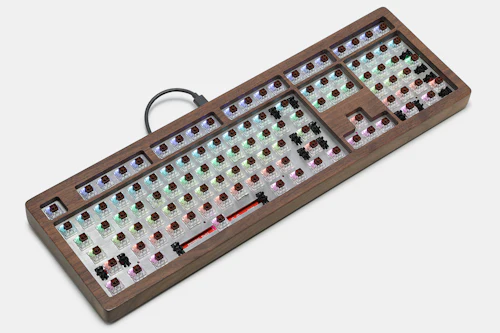
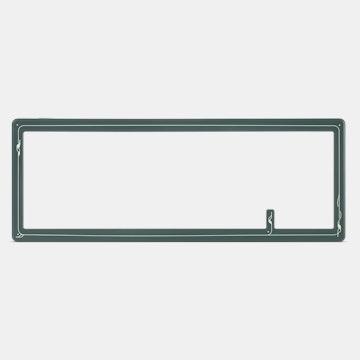
AoPo AP108 Wooden Mechanical Keyboard Kit
01 / 07
AoPo AP108 Wooden Mechanical Keyboard Kit
bookmark_border
Where's the price?
To negotiate the best possible price for our customers, we agree to hide prices prior to logging in.
348 requests
·
69 Sold
Product Description
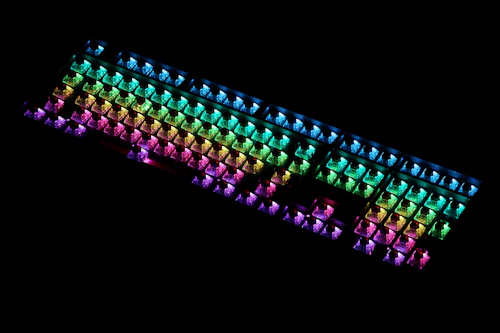
Create your next keyboard with notes from nature. The AoPo AP108 Wooden Mechanical Keyboard Kit combines a real rosewood case with vibrant SMD RGB LED lights to set the stage Read More
Customer Reviews
1.5
(13 reviews)
5star(0)
4star(0)
3star(2)
2star(2)
1star(9)
search
close
Images
keyboard_arrow_downSort by: Top Reviews
keyboard_arrow_downzshiftml
2
Nov 7, 2019
checkVerified Buyer
For starters, whatever controller this uses doesn't work with OS X. Everytime I plug it in, it registers as a new keyboard. It only works the first time I plug it in, then I have to reboot every time if the cable becomes unplugged. WTF.
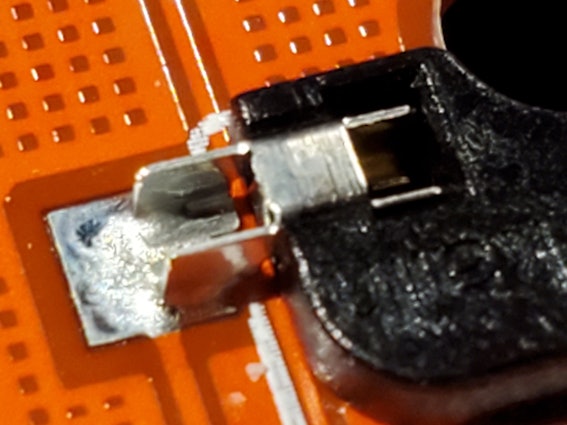
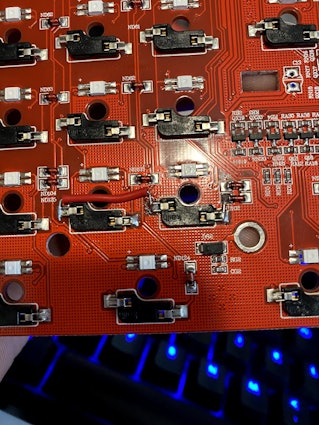
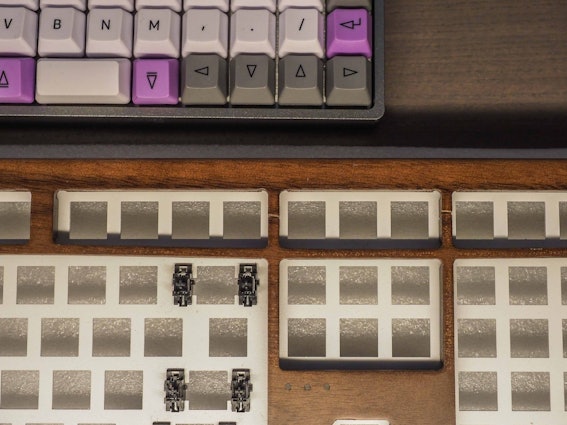
The solder joints on the hot-swap connectors are incredibly weak. I ripped one off in the first few minutes just installing the switches.
One of the RGB lights came broken, phsyically, with a crack down the middle. The usb daughter-board doesn't seem to be USB compliant, as it doesn't work with a usb-c to usb-c cable. Nothing happens, not even power. It only works with the included usb-c to usb-a cable, or with a usb-c to usb-a adapter. For something that the industry has had working for decades, this is by far the worst product I've ever bought.
It's not worth the $10 you would pay for a used keyboard on ebay, let alone a premium product from Drop.
Edit: I also can't find anything on the microcontroller used, FK5338AL. 0 Google results.
For reference, markings on the board:
FK5338AL Ver1.1
IFP350 13302
19 26
[+] US [ ] KR [ ] UK
(Edited)
Recommends this product? No
editjames
1
Nov 15, 2019
zshiftmlI finally managed to get my keyboard working! I am running into the same problem you had on MacOSX. It's setting it up as a new keyboard every time I plug it in. On top of that.. it sets it up as a new language. The only way I have found to fix it is to restart my computer. Have you figured out a work around so that when I unplug my keyboard it doesn't reset itself?
aaronireland
40
Jan 25, 2021
checkVerified Buyer
Beautiful wood case, useless PCB
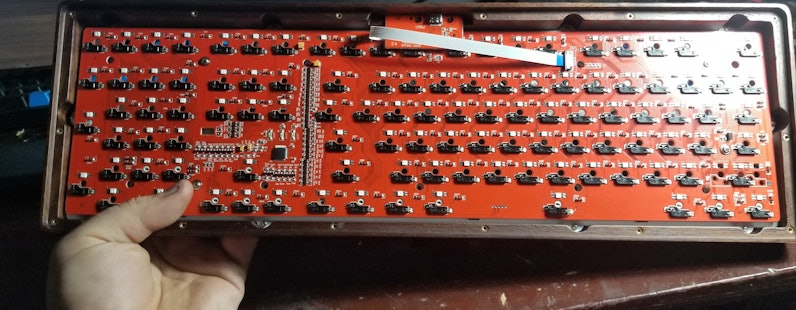
- I disassembled the board completely and inspected the PCB and all traces. I confirmed that there is far too little solder applied to the Kailh hotswap sockets. It seems like the entire board including the sockets was done with reflow soldering and while I don't have a ton of experience with that process it looks like the temperature might have been a bit too low on top of the lack of paste applied to the sockets
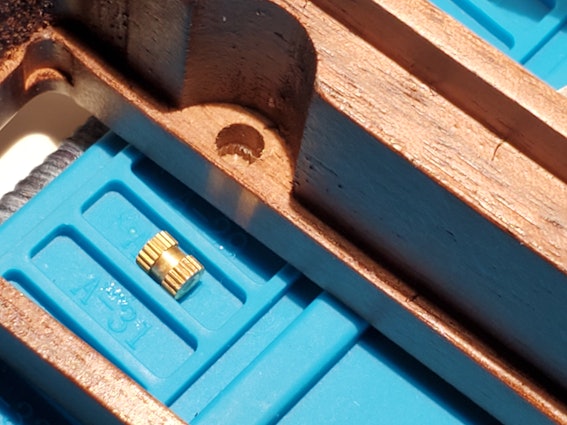
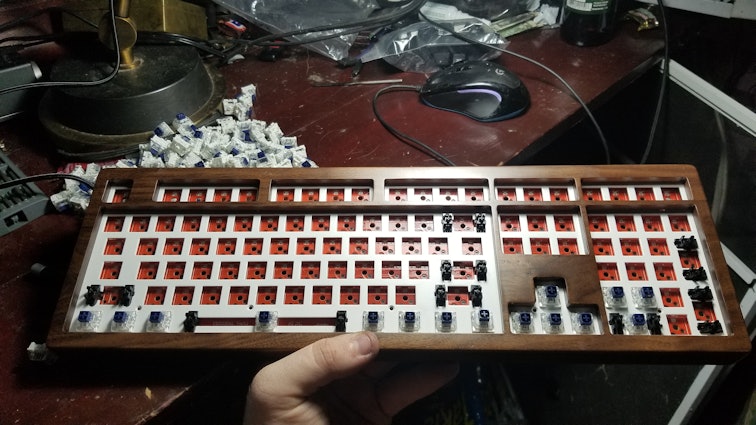
- The brass inserts used to secure the plate to the top of the case weren't glued in at all or if they were a nearly microscopic amount of glue was used. The "bending" and "flexing" described in the reviews is almost certainly because of this. I very carefully pulled out all the loose inserts and reinserted them with some epoxy and clamped them for 90 seconds or so being careful not to damage the wood on the top of the case. The result seems to have worked brilliantly and there is no flexing with the exception of the area directly above the space bar.
- There are two holes in the plate that line up with holes in the PCB right in the center, but no screws/washers were provided. Had these two places been secured (along with more secure brass inserts used) there'd be no issues with the bending/flexing. Really sloppy on the vendor's part to miss this in the QC process as it would've been really easy/cheap to fix before shipping these.
- The stabilizers weren't terrible actually. It appears they were lightly lubed when the board was assembled, but I still did my own lubing with Krytox 205 g0 and dialectric grease on the wires. I didn't need to clip or apply band-aids or anything.
- I tested the keys every step of the way and had everything working right up until the point where I screwed the case on the back. As soon as I did, zero key presses were registering even though the LEDs were lit. I am going to take it apart again some other time and try and troubleshoot that if I can. It's possible that the small amount of pressure I applied screwing in the back was enough to break a socket and/or there isn't enough clearance for the pcb at the top and the case is applying pressure somewhere?
(Edited)
Recommends this product? No
famguy07
79
Nov 13, 2019
checkVerified Buyer
A Beautiful Board Ruined By Mounting
It's a shame such a beautiful keyboard has such shitty mounting. That is my only complaint, but its a huge one.
First, The mounting of the USB C daughter board was too tight or something, meaning not one of the keys on the board worked. After removing the daughter board and retesting with while unmounted, all my keys worked. Reattaching it with much less force means that it works in place now.
Second, as others said, the mounting of the PCB is complete shit. Whoever thought top mounting a hotswap PCB with only 4 screws from the PCB to the plate over a full size keyboard has obviously never designed a keyboard before. The good news is that the top mounted plate feels solid, as a top mounted plate should, so once you have your switches in place, they will stay and feel just fine. Getting them into place, however, is a separate task entirely. Again, as others said, the PCB warps horribly, especially on row 5 (spacebar row) and on the far right by the numpad. I had to open the case just to support the back of the PCB each time I went to insert a switch.
I did not have any issues with the hotswap sockets disconnecting from their solder joints, however, there is not a lot of solder on any of the joints, so I can easily see why others are having issues with them.
If it weren't for the mounting issues, this would easily be a 4-5 star keyboard. It's absolutely beautiful. I would only drop it to 4 stars if the software doesn't work well or is missing features. I may update that in the future. However, with the mounting issues, I have to give it 1/5 out of the box and up to 3/5 once fixed.
Recommends this product? Yes
Igarashi
15
Nov 6, 2019
checkVerified Buyer
(Edited)
InHocus
0
Nov 25, 2019
For those that are new to this, do you have a good write up for this? only one of my sockets ripped off, and would love to fix this for my wife
zshift
0
Dec 26, 2019
InHocusSorry for getting back to you so late. There's on guaranteed solution for all of the switches, as I'm not sure if they're all wired identically. You'll have to following the traces on the board to see where they connect. However, they will always connect to common rows and common columns. Both of my pads ripped, but even if just one did, I'd recommend performing the same repair, as there's now more strain on that switch. Take any piece of thin wire, extra component leads/legs, or anything conductive that fits, really, and jump it to the next component. You'll need the wire, solder (60/40 lead w/ rosin core will be the easiest to use), a soldering iron with a clean tip (Google for how to do this), and a multimeter to check that everything works. Solder in a well-ventilated room, don't breathe in the magic smoke, and put a fan near you to blow it away if you can. Once you're done, set the multimeter to continuity mode and touch either end of the wire. It should beep. Or you can just plug in the USB connector and touch the switch if you have it installed, or jump either side of the pins on the black pad to each other (same effect as pushing the switch).
MidnyteRabbit
10
Mar 18, 2022
checkVerified Buyer
Beautiful case, terrible internals.
First off, my board works. But it didn't start that way.
I used some less common switches (Aliaz Silent Tactile 100g) and had to clip the extra pins (5 pin to 3 pin conversion). Installing these required me, like others, to open up the keyboard, and indeed there were support screws missing. Installing the switches while applying pressure to the reverse side was the only way they would actually stay in the sockets.
Closed it back up and discovered several "columns" of keys were functioning correctly. It took about an hour to figure out what was still wrong. The board and the power-connecting piece had physical contact where there shouldn't be. Using a rubber spacer, I ensured the two pieces no longer interfered with each other. Now all the keys work, although the F10 key is finicky sometimes and takes a few presses to register; I believe I may damaged that socket during the spacer process.
If you don't mind DIY repair work, it's a beautiful board. But I don't recommend it out of the box.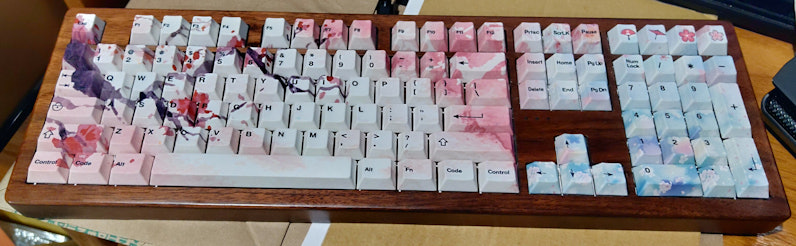
Recommends this product? No
Nepheloyd
0
Jul 10, 2020
checkVerified Buyer
Half of the keys didn't work and I ended up returning it :( Shame because it looked and felt amazing and was going to be a present
dbrooks75
1
Jan 13, 2020
checkVerified Buyer
Nice looking, but too many flaws for the price.
Same issues as already mentioned, but in addition, half of the top letter key row (QWERTY...) had the red part of the RGB led go bad.
Recommends this product? No
daytonm
0
Jan 8, 2020
checkVerified Buyer
Unfortunate
First red flag was when I turned the board over and the back plate screws were not screwed in properly and will not seat correctly.
The board was also cracked which I did not notice as much at first, but it appears the plate is simply too big for the top case.
It's really unfortunate as the aesthetics of this keyboard had so much potential.


Recommends this product? No
BlainetheMono13
1
Nov 14, 2019
checkVerified Buyer
Beautiful trash
Warped board led to non-functioning keys. Super unfortunate, ended up sending back. It was the perfect piece for my office.
Recommends this product? No
Showing 17 of 20
Recent Activity


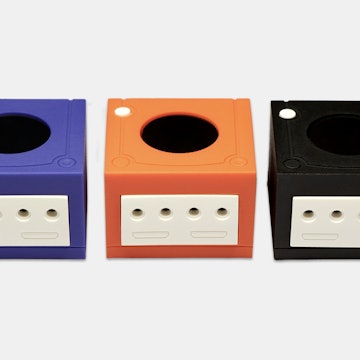
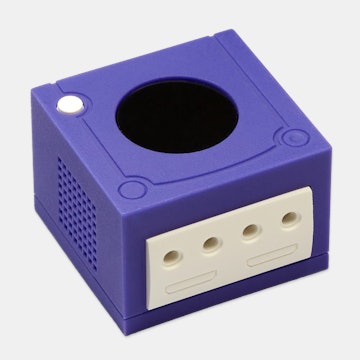
Related Products


Drop Refurbished
Like-new products you can trustDrop Rewards
Get $5 for every 500 points you earn! Learn more
Drop Keyboard Club
Become a member and expand your keycap collectionCollaborate With Us
For Brands & DesignersFollow Drop
- The keyboard is one of the most beautiful that I have seen.
- It is one of the only hot-swappable full-sized keyboard kits on the market
Most of my criticisms are simply echoing what everyone else has experienced. Negatives:- The PCB needs at least 4 more mounting screws along the outer corners to keep it from warping or bending when pressed.
- The switch contact points are not soldered firmly enough to the PCB. If you're not careful, they can pop off when attempting to insert a switch requiring the customer to re-solder it back into place.
- Because the PCB is not mounted securely and flush against the front plate, you have to disassemble the keyboard and put direct pressure on the back of the PCB in order to install some of the switches on the edges of the keyboard.
- When the keyboard arrived, at least 3 of the mounting screws were rattling and rolling around loose in the inside of the keyboard. I had to remove the back plate and screw them back into place.
- My keyboard had a noticeable scratch on it. The scratch seems to be underneath the varnish, which means that it was present before the keyboard was finished.
- The status LEDs bleed into one another. It is difficult to tell which ones are lit and which ones are not. (I might be able to fix this by placing some blackout material in between the LEDs under the top cover).
- The software is limited. The 108th key on the keyboard (all the way in the top right corner) doesn't seem to do anything and the software does not let you assign it to anything. The Right WIN key and FN key positions are swapped relative to all of my other US keyboards. The software does not let you swap them or remap the FN key.
- I am not seeing the creator of these keyboards respond to any of the concerns that people are raising. If you buy this keyboard and have problems, it looks like you're on your own.
There are two other features that I'd like to see in future keyboards like this one: