Click to view our Accessibility Statement or contact us with accessibility-related questions55% would recommend to a friend 


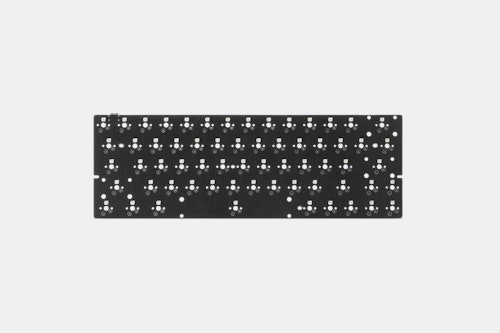
BM60 60% Hot-Swappable RGB PCB
Customer Reviews
3.3
(15 reviews)
5star(4)
4star(3)
3star(4)
2star(2)
1star(2)
search
close
Images
keyboard_arrow_downSort by: Newest
keyboard_arrow_down
Blur410
24
Oct 31, 2022
checkVerified Buyer
Fragile and pricy
The PCB worked. I broke one of the hot swap sockets on installation. Now I'm sad. Also the pricing for this on drop was too high.
Recommends this product? No
MichiKin
3
Aug 21, 2022
checkVerified Buyer
Did everything I wanted
Definitely enjoyed using this pcb! Favorite part was the encoder!
ZanBarBone
43
Jun 11, 2022
checkVerified Buyer
North Facing Switches
The switch orientation is north facing. IF this is a deal breaker for you, this PCB is not for you. In my case I used it for a build with KAM profile keycaps so the switch orientation didnt matter to me. The PCB itself is good. I loved the layout with the arrow keys and a rotary encoder. Please keep in mind that this PCB is VIA capable but does not come compatible with it out of the box. You will need to flash it with QMK tools first. There are guides online on how to do it.
Recommends this product? Yes
JayJay100
0
Mar 16, 2022
checkVerified Buyer
Not a fan.
The PCB was cool but when you plug the PCB into VIA, VIA doesn't recognize the PCB... If you try to follow their tutorial on how to add the via.json to VIA its an absolute shit show. Not very user friendly at all. They require you to download a link from Google Drive then there are 20 files to choose from. Literally one wrong move and your PCB is bricked and that's exactly what happened to me. Don't waste your money, go buy from a reputable organized PCB designer.
Recommends this product? No
MZWissmann
11
Dec 28, 2021
checkVerified Buyer
EXCELLENT
Everything you need in a PCB for a true 60% custom build. Highly recomend for anyone, novice or expert. Only drawback might be that it doesn't look as good as other 60% PCBs but for the price this is definitely a banger.
Recommends this product? Yes

carlosmjr
13
Jul 19, 2021
checkVerified Buyer
Good construction, bad instructions
It's a good PCB with lousy instructions.
I've opted for QMK Configurator and QMK Toolbox. The other alternative is VIA.
Recommends this product? Yes

zakkday
5
May 19, 2021
checkVerified Buyer
Decent if you have patience
Claims to be VIA compatible and that might be true with some QMK flashing, definitely not supported out of the box. Encoder knobs it comes with are cheap plastic but do the job. On-board programmed RGB lacks solid white for some reason? Had difficulty getting my screw in stabilizers to sit flush. Other than that a decent PCB but maybe not good for your first build.
boser10
19
May 17, 2021
checkVerified Buyer
Decent board with horrible instructions
Overall actually really happy with the quality of the board itself, looks really clean and they bothered to indent the SMD LEDs so that it doesn't interfere with most switches. North-facing switches means that there might be interference with some cherry profile keycap sets. Also, for the encoder versions getting the right keycap set can be challenging due to the 1U backspace.
The instructions found online for this keyboard are absolutely horrid and incomplete. The actual process isn't that hard, but took quite a while for me to figure out. Bear in mind this is my first time building a board on my own, but given the price point of this board, surely many beginners will be facing the same issues too.
First, install QMK toolbox and download the required drivers. There are many good tutorials for this on youtube. To reset this board specficially, hold esc before plugging the keyboard into the computer. Then the board should show up in QMK toolbox, and you should be able to flash the requisite files. For QMK, use the .hex file found under keyboards -> bm60ec or rgb or rgb_iso depending on which board you bought. The link has been posted in other reviews but I'll link it here anyway: https://drive.google.com/drive/folders/1su_i93QM5UeZfjpvxxjCOWTYYDcPdWVS
Once the correct file has been selected, just press flash.
Once the firmware has been flashed onto the board, you can then use VIA to edit the keymap and various function layers. Make sure that you have all the settings enabled under settings in VIA, and have the correct .json file loaded into the software, if not the keyboard won't show up in the software. The .json file can be found in the same link. The controls for the RGB lighting are found in the first function layer by default.
I'm a beginner and idk if I got all the steps and information 100% correct or if all of these steps are necessary, but this is what I did to get my bm60 working. Hope this helps someone! Would have saved me a lot of time if someone had posted this before
Recommends this product? No
bhusted96
21
May 17, 2021
checkVerified Buyer
Great board
Perfect 60% board for any rotary encoder fan boy. Took me a day to figure out how to remap the encoder but works great once its done. I personally use it for volume but it can be mapped to do just about anything. The board is very similar to dz60 so most 60% cases work no problem. The only con is the south-facing switches and it was a little difficult to reprogram. I had to map it in via and then use https://noroadsleft.github.io/kbf_qmk_converter/ to convert it to be able to flash the new map with qmk. You can find the board firmware files here https://drive.google.com/drive/folders/1su_i93QM5UeZfjpvxxjCOWTYYDcPdWVS
(Edited)
Recommends this product? Yes
Kalbi
14
May 11, 2021
checkVerified Buyer
awesome board but hard to program
So trying to program this board was not that easy. But once you get the idea and do your research, it might be a little easier. Once you get the board programed to your liking, everything is awesome!
Recommends this product? Yes
Showing 11 of 16
Recent Activity


.png?auto=format&fm=jpg&fit=fill&w=500&h=333&bg=f0f0f0&dpr=1&chromasub=444&q=70)


