Click to view our Accessibility Statement or contact us with accessibility-related questions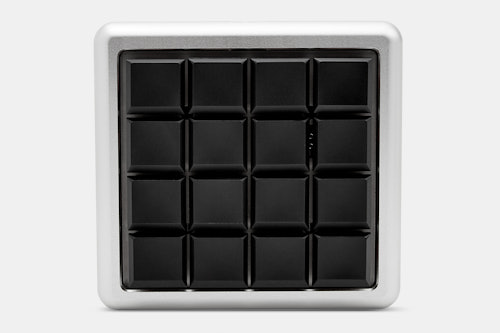
25% would recommend to a friend 


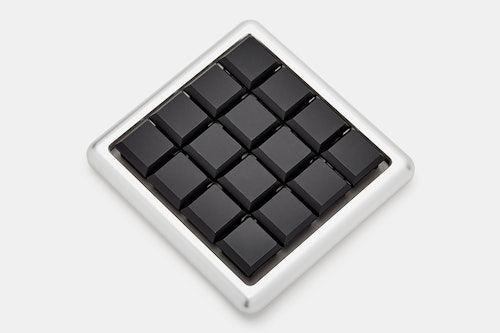
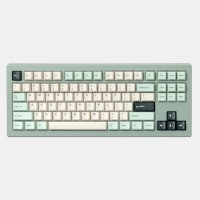
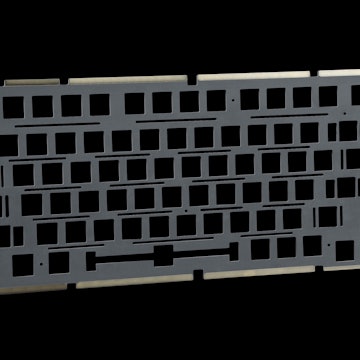
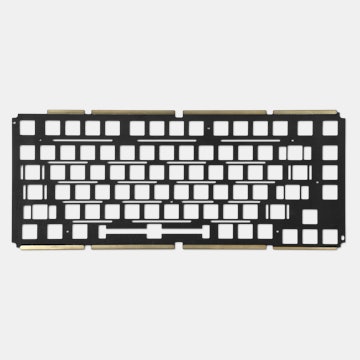
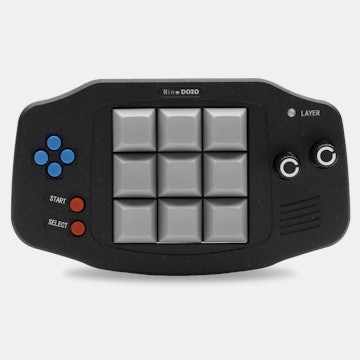
BM-16S Programmable Macropad (Choc Switches)
01 / 21
BM-16S Programmable Macropad (Choc Switches)
bookmark_border
Where's the price?
To negotiate the best possible price for our customers, we agree to hide prices prior to logging in.
1.2K requests
·
254 Sold
Product Description
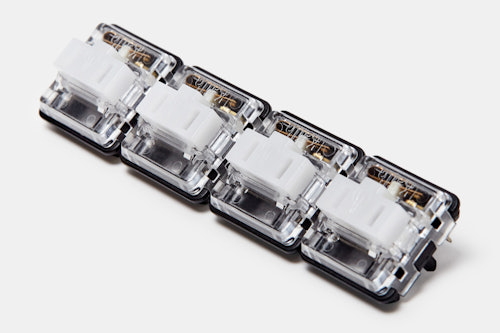
If you have room for it, a mini pad makes an excellent companion to your keyboard. This kit comes with everything you need to build your own, including 16 low-profile Kailh Choc switches Read More
You Might Also Like


Customer Reviews
3.2
(19 reviews)
5star(3)
4star(6)
3star(4)
2star(4)
1star(2)
search
close
Images
keyboard_arrow_downSort by: Top Reviews
keyboard_arrow_downpocketoperator
190
Nov 15, 2020
Pretty sure I could resin cast something like that. But given the build it would leave most of the MX switch exposed. I can give it a try though and see how it works out. Would be an interesting experiment.

eltonka
0
Jun 9, 2019
checkVerified Buyer
Great little pad. Fully functional out of the box, had a bit of configuration hurdles but was able to figure it out with the community and some googling.
KUNGPAO
100
Apr 20, 2019
checkVerified Buyer
(Edited)
assistcontrol
36
Jun 27, 2019
checkVerified Buyer
Very poorly made
In addition to the baseplate having been miscut, blocking two of the switches from being inserted, two OTHER switch sockets were bad.
I asked my 6 year-old to tell me why I couldn't fit the clicky bits into the hole. She stared at it a minute, and said, "The silver thing is in the way." So there you have it. My 6 year-old is better at quality control than the circus clowns who made this.
Recommends this product? No
pocketoperator
190
Aug 11, 2019
Hmm, I don't know mate. That sucks, but just keep reminding them? Personally, I had a good experience with support so far.
KUNGPAO
100
Oct 29, 2019
assistcontrolKprepublic sells the components for this if you still wanna use somehow. https://kprepublic.com/products/bm16s-plate-custom-mechanical-keyboard-plate-only-for-bm16sstainless-steel-plate-16
Kwyzar
10
Aug 4, 2019
checkVerified Buyer
Handy, but difficult to program.
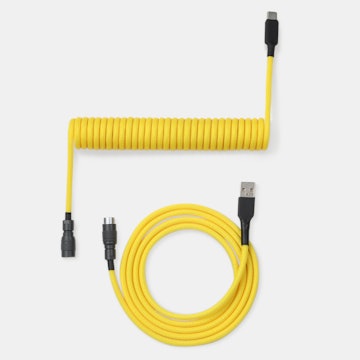
When i got the pad it came in parts and had to be assembled, which wasn't that hard. I personally don't like the keycaps because they feel thin and cheap, but those can be changed if desired. It doesn't come with a type C USB cable of its own so i have to sacrifice another keyboard's type C just to use it. Programming it isn't easy if your completely new to it. Took me a while to figure it out. I have done something similar with my MD ALT keyboard, but this pad i had to browse the internet for answers because it didn't even come with simple setup instructions. Currently I still haven't programmed it properly because I have trouble flashing it. It just resets back to the default layout when unplugging it after the flash. If this came with a simple setup instruction manual or tutorial video its wouldn't be so bad.
Recommends this product? No
pocketoperator
190
Jan 30, 2020
KwyzarIf you still have trouble:
Best way to program is through QMK here:
https://config.qmk.fm/#/bm16s/LAYOUT_ortho_4x4
But first download the appropriate json (BM-16S) file here:
https://drive.google.com/drive/folders/1tlTHQIFcluK2mjZ4UbbKCsdRLgSRSPw6
Do not use the Keyboard Firmware Builder, it will only flash the default layout regardless of what changes you've made.
QMK will work just fine.
(Edited)
Keycopter
47
Jul 27, 2019
checkVerified Buyer
Not a "kit" just a bag of stuff
All you get is an unlabeled black box with some bags of components. No instructions whatsoever. That's not DIY, that's FEOYWAH (figure everything out yourself without any help). The board requires screwing it down to the plate or else the PCB flops around inside the case. But the screws they ship are the tiniest screws I've ever seen. Are there such a thing as 1/512" hex keys? Do I need some kind of jeweler's tool? I don't know because there are no instructions!
Recommends this product? No
Ghenghis
55
Keyboard Club Member
Jan 4, 2022
checkVerified Buyer
Not bad
This does the job, though I am not a big fan of the low-profile switches.
Uglymonkey913
24
Nov 21, 2020
checkVerified Buyer
Not too slim, Useful, Rough First User Experience
This thing for sure doesn't come with a manual in terms of setting it up. I had to buy a separate USB Type-C cable for this to fit my needs but these days they're becoming more common so not a big deal. I had to read through the comment section to find a few people who had links to sites where you can program the buttons. There are no instructions in the box to buyers beware. If you want an out of the box experience where it just works then go elsewhere. If you want the most customizable macro pad then this is it. Plus it doubles as a blunt weapon if you need to smack things because of it's super nice metal construction. : 3
Recommends this product? No
camdude
203
Apr 13, 2020
checkVerified Buyer
Great kit, easy and fun
This was a fun quick project. Physically building it is a piece of cake, just make sure you line up the hole in the plate with the reset button. I haven't tried customizing it yet, but it doesn't look too hard. One issue is that it doesn't have enough keys for a full numberpad, luckily I don't need * or / very often in my day to day work. I'm looking forward to getting the layers working to set up some macros.
My biggest issue was that the LEDs were broken off during shipping. It looks like they were torn off the board. Luckily drop offered a partial refund, and I found them all in the box, and was able to re solder them back on. I wouldn't say its an issue with the product.
Recommends this product? Yes
Jaysah
56
Apr 13, 2020
checkVerified Buyer
It is okay... I wish it was better.
This pad would have been wonderful if the kit itself did not look like it went through a war zone. The caps were scratched, the plate was a little bent, the case was little chipped, and the pcb takes a little bit of force to get to sit into the case. However, with a little bit of love and a black sharpie, I was able to hide the scratches a little on both the caps and the case. I like the thinness of the pad so I am rating it a bit higher than I would if i wasn't such a sucker for macropads.
Recommends this product? No
Showing 22 of 31
Recent Activity


Related Products


Drop Refurbished
Like-new products you can trustDrop Rewards
Get $5 for every 500 points you earn! Learn more
Drop Keyboard Club
Become a member and expand your keycap collectionCollaborate With Us
For Brands & DesignersFollow Drop
My success stems completely from "textonly" and "blacksunix"posts under the BM-16A drop discussions https://www.massdrop.com/buy/bm-16a-16-key-programmable-mini-pad-kit/talk/2331792 READ these. The only changes I made were to use the json layout files for the BM-16S from the Google Drive
Get: QMK Toolbox from Github, install it Get: the default JSON and instructions from manufacturer Google Drive. This is on their Aliexpress page for the BM-16A as mentioned by "jf647" here. So you can just search for it as well.
- I used https://kbfirmware.com/ to modify my layout. Upload the "BM16S.json" file from the manufacturer Google Drive pack into kbfirmware.com
- This loads the basic layout in kbfirmware.com. Customize it
- Backup your json if you wish under the Settings tab. Then go to the Compile tab and export the ".Hex" file and load it into QMK Toolbox. Make sure the right chip is correctly selected in the toolbox UI
- Connect the board to the computer. I shorted the reset pins, labeled "RE" next to the smaller of the board chips, with a pair of needle nose pliers. Definitely gonna solder and run an external switch there at some point...
- The keypad will be put into DFU mode with this reset, and will then be visible in the QMK Toolbox console. Here you can flash your custom Hex file to the board
- Unplug, replug
------------------------- Note that the Google Drive JSON can be found here: https://drive.google.com/drive/folders/1tlTHQIFcluK2mjZ4UbbKCsdRLgSRSPw6 Here are some pics of how I shorted the terminals in the RE box: