Click to view our Accessibility Statement or contact us with accessibility-related questions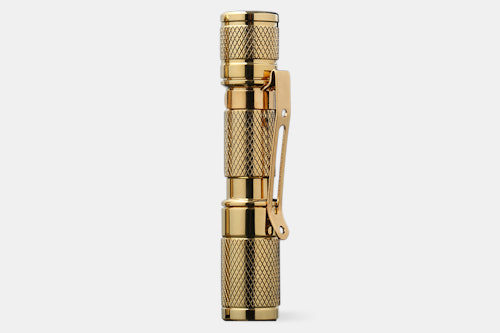


Drop Brass AAA Pocket Flashlight
01 / 11
Drop Brass AAA Pocket Flashlight
bookmark_border
Where's the price?
To negotiate the best possible price for our customers, we agree to hide prices prior to logging in.
675 requests
·
Free Returns in USA
Product Description
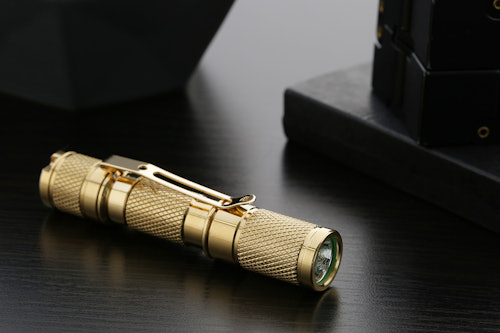
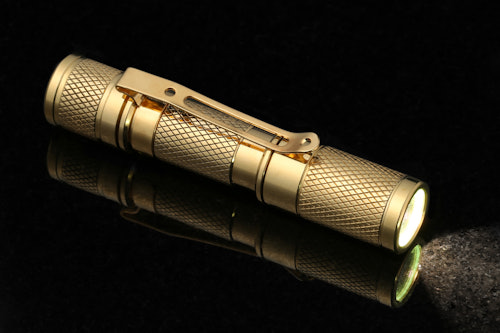
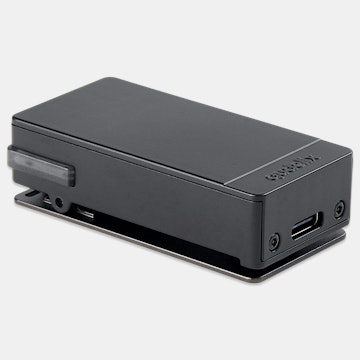
Made for the EDC Community, the Massdrop Brass AAA Pocket Flashlight is about the size of a tube of chapstick—but it pumps out 110 lumens and casts a beam as far as 154 feet (with the CREE XP-G2 R5 LED). Despite measuring less than 3 inches long, it weighs 1.5 ounces for a substantial feel in the hand Read More
You Might Also Like


search
close
Sort by: Newest
keyboard_arrow_down
SDBGuitars
40
Mar 16, 2021
LukasMAppears to be $40 on Amazon instead of the $30 I paid through Drop, though... 😒
(Edited)
Lucun
30
Nov 16, 2023
I disassembled the full thing after a AAA battery leaked acid all over the insides, and the battery acid destroyed the button switch board. Seeing as how others have had issues with the button switch dying, here's a nice trick to continue using the flashlight without the button switch. Make sure the LED isn't what is broken first!
- As others have mentioned, there is a button end and the LED end, and both ends are screwed onto the middle barrel. Unscrew the button end. The button end has the battery contact spring. There is some sort of loctite, so you may need some pliers to unscrew it.
- After unscrewing it, inside the button end threading, there is a metal ring with 2 holes. That metal ring is threaded and screwed into the button end threads. I used needle nose picks like chopsticks to unscrew the metal ring. May take some force to get it started, but once you do, you just need 1 pick to twist it all the way out.
- Once the metal retaining ring is gone, you can push the button hard to push out the control circuit board with the battery contact spring. I suspect an issue is that the button or the on-board soldered battery is dead. I ripped out the tiny soldered on battery with my needle nose pick.
- From there, get rid of the black rubber ring glued around the battery contact spring. Be sure to clean up as much of the glued rubber residue as possible.
- Next, I took a piece of heavy duty aluminum foil twisted it into the battery contact spring, getting it as close to the control board as possible. Make sure the foil connects the battery spring metal to the outer ring metal of the control board, and get the foil twisted as flat towards the board as possible.
- Trim off the excess foil so that the control board slides back in easily.
- Finally, put the control circuit board back into the button end cap like how you took it out, and tightly screw back in the metal retaining ring. Make sure the retaining ring starts screwing back in easily until it starts tightening to avoid destroying the threading. The ring is used to complete the circuit with the foil. Re-assemble the rest of the flash light.
(Edited)


Kaiz3n
0
Nov 30, 2021
noahdwilkeYes, works great. Sure the head gets hot and I wouldn't run my battery down on high the whole time, but I don't do this with any lights unless it is cold outside and I need the high output so much that I will deteriorate my battery by running down super low.
snowmangoinmo
4
Dec 11, 2019
I doubt this is any where close to a county comm flashlight they don't sale crap!!
snowmangoinmo
4
Dec 11, 2019
worked great for a month now it doesn't work at all I loved it at first now I hate it!! switch stopped working.. You can hit it really hard on the tail switch to get it to turn on but that is the only way to get it to work... Very disappointed!!!!!
Chugun
0
Nov 28, 2019
Dropped it once and it completely stopped working. Tried different things and fiddled around, but it seems to be dead anyway. :(
Showing 15 of 412
Recent Activity


Related Products


Drop Refurbished
Like-new products you can trustDrop Rewards
Get $5 for every 500 points you earn! Learn more
Drop Keyboard Club
Become a member and expand your keycap collectionFollow Drop