Click to view our Accessibility Statement or contact us with accessibility-related questions86% would recommend to a friend 


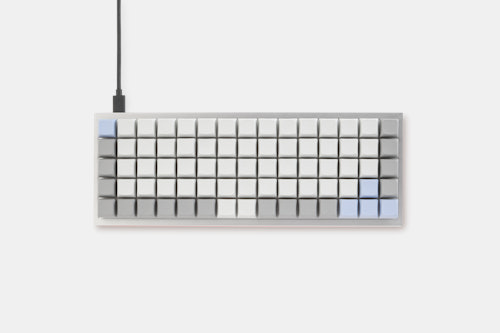
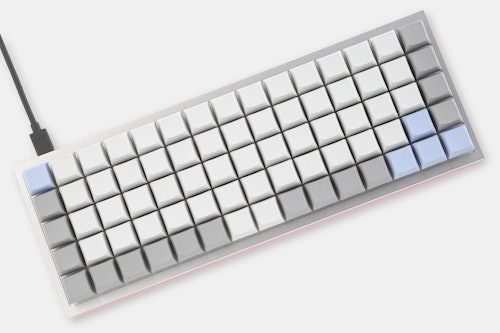
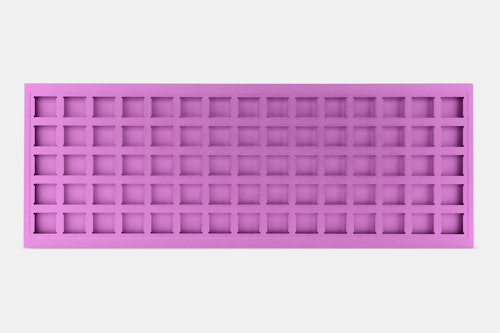
ID75 Hot-Swappable Ortholinear Keyboard Kit
ID75 Hot-Swappable Ortholinear Keyboard Kit
bookmark_border
Where's the price?
To negotiate the best possible price for our customers, we agree to hide prices prior to logging in.
3.1K requests
·
330 Sold
Product Description
Ortholinear keyboards are designed to increase efficiency and reduce finger travel when typing. Though it’s large for an ortholinear board, the ID75 gives you free reign over every key—so, if you get good with it, it’s bound to make work and play a lot more fun and effective Read More
Customer Reviews
4.0
(22 reviews)
5star(7)
4star(9)
3star(6)
2star(0)
1star(0)
search
close
Images
keyboard_arrow_downSort by: Newest
keyboard_arrow_downwylify
18
May 25, 2021
checkVerified Buyer
Nice and very basic ortholinear
The keeb is quite nice, affordable, and easy to use. The case sound feel is quite harsh because of the integrated plate, but works as advertised and looks quite good. Great for someone wanting to try ortholinear hotswap board, or custom extra large macropad.
Macdo226
8
Mar 27, 2021
checkVerified Buyer
Solid
Solid keyboard, well built would recommend
Recommends this product? Yes
nekokun
14
Dec 24, 2020
checkVerified Buyer
Nice little piece of technology
I like this very much
Recommends this product? Yes

mrwestfall
16
Jul 30, 2020
checkVerified Buyer
Pretty Good Keyboard
Everything works, it's solid, it looks good. This is a basic Ortho keyboard with a lot of keys. The hotplug switches make it a breeze to to assemble.
Recommends this product? Yes

MM1377
9
Jul 30, 2020
checkVerified Buyer
My first keyboard kit
This was my first keyboard kit. I have one other mechanical keyboard (Tecware Phantom RGB) and while it has hot swap switches, they are Outemu and incompatible with anything other than Outemu. What attracted me to the Drop ID75 was that it had hot swap switches, was ortholinear, and was essentially like the XD75 that I’d been looking at but came from Drop rather than Aliexpress. I placed my order in January before all the shutdowns started. It finally arrived in May, not sure how much of that was due to lockdowns and how much is “normal”. This was my first kit and while I had assembled and disassembled PCs and laptops before, I’d never assembled a keyboard. I read some of the notes and discussions and was glad that I did or I’d probably have tried to do it in the wrong order (putting the switches in first and then trying to put the PCB on). As it was assembly was very easy. I’d recommend this to a friend who was interested in OLKB, but OLKB does take some getting used to.
PROS:
Case is _solid_, smooth, and very nice
Cutout for the usb socket lines up nicely and looks high quality (reviews of similar keyboards mentioned this as not being good on those)
Assembly was easy
Flashing with QMK is also easy.
The underglow RGB lighting is nice
Hotswap switches are easily hot swapable as advertised.
CONS:
Very little documentation. Read the discussion and the reviews here on Drop, since it seems to be the best source of information. The key layout can be found on the QMK site at this URL…
https://github.com/qmk/qmk_firmware/blob/master/keyboards/idobo/keymaps/default75/keymap.c
NOTE that this is NOT the layout that appears on the QMK site at this URL (which is the right firmware)
https://config.qmk.fm/#/idobo/LAYOUT_ortho_5x15
While the assembly was easy, I hope I never have to disassemble it. The screws are very small and the metal felt soft as well. I would be concerned about stripping the screws if I took them out too often.
There are no LEDs for the keys although it appears you can add that in, but I’m not interested in soldering LEDs at this point. Also it would be single color LEDs not RGB LEDs.
NOTES:
This is an ID75 and NOT an XD75 so choose the right firmware when going to the QMK site.
https://config.qmk.fm/#/idobo/LAYOUT_ortho_5x15
Some people have commented that they were disappointed about the lack of a hole in the bottom to be able to hit the reset switch on the PCB but this really doesn’t need to be an issue. When programming the firmware, just make sure to program a RESET key on one of the layers and it is no problem. I’ve reprogrammed my keyboard over a dozen times already and haven’t opened it up to hit the reset switch yet. Just hit the Reset key and you can flash the keyboard easily.
I wanted to like the original keyboard layout which is basically a split ortho with arrow keys and other special keys in the center 3 columns but after working with it for a few days I found the center column too far to reach without moving my hands off the home row keys so I changed my layout to just have 2 special columns in the center and moved the 3rd extra column to the far right side.
I took inspiration from some other OLKB keyboards that use QMK and used the QMK website to make a new keyboard layout. I have QWERTY on the default layer, Dvorak on another and Colemak on another. I use QWERTY and Colemak (which I’m learning) the most. The Lower layer provides access to the F-keys on the home row and the Raise layer provides access to shifted numbers on the home row. Pressing both simultaneously provides access to the Meta layer where the keys for changing the RGB and choosing the keyboard layout (QWERTY, Dvorak, Colemak) and the very important RESET button live.
Recommends this product? Yes
Toddes
43
Jun 11, 2020
checkVerified Buyer
Happy with the board, but, takes some getting used to.
kN0Xygn
1
Jun 10, 2020
checkVerified Buyer
4.5 Excellent Ortho Board
Programmable, hotswappable, great looking LED trim with different color effects, huge 75 key layout (relative to other ortho layouts), what's not to love?
Well, the build quality is a little questionable. One of my frame screws doesn't actually grab, the rubber feet are larger than the holes for them in the aluminum, and the clear plastic for the LEDs isn't perfectly flush with the aluminum body. Are these things a big deal? The bad screw maybe, but I have been using this for almost a year now as my primary work keyboard for a programming job because it greatly outshines the traditional layout in terms of comfort, even for things like _, (), {}, [], `, and ~.
Recommends this product? Yes
kN0Xygn
1
May 5, 2021
kN0XygnAn update on this - I have now been using this keyboard as my primary work keyboard for over 2 years and have flashed it's layout a few times for more favorable function-layer keys. My only qualm anymore is that it doesn't have feet that tent the whole thing upward. I currently tuck a sticky note pad underneath.

tharaeus
12
May 25, 2020
checkVerified Buyer
Great keyboard, hard to find good keycaps.
I've had this keyboard for awhile now. The build quality was great. I read lots of reviews before buying it so I was aware there was no hole in the bottom to allow the keyboard to be placed in DFU mode, so the first time I flashed it I made sure I had set a keyboard sequence to do the same thing.
The biggest issue I can see is that most ortho keyboard keycap sets focus on the 60 key keyboards. The 75 key don't seem to be as popular. I have see some great builds but the issue always seems to come down to the lack of good 2U keys for things like the enter key or something like a 4U or a 5U key with proper stabilisers for a normal space bar. Lots of people 3D printing solutions or cannibalising keycaps for their stems and gluing them into a 2U keycap. I would just like more keycap options.

Keycopter
47
May 14, 2020
checkVerified Buyer
Great, well made, solid board! But you should try ortho first before buying
The board itself is pretty fantastic -- build quality is great, feels nicely heavy, and supports hotswap. This is probably the best way to try ortholinear for a beginner, because you're not also having to adjust to the limitations of a 40% at the same time.
There are not a few drawbacks:
- The case has no hole to reach the PCB's reset switch. Until you program the board with a soft reset key, you have to disassemble the case to press it.
- As is typical of "small manufacturer" stuff on Drop, it comes with NO INSTRUCTIONS at all. Does it come with a soft reset key? No idea. I have no idea what these 6 extra screws are for. I don't know if it's possible to change the LED color. And so on.
- You have to figure out QMK compatibility yourself (there is no preset in the QMK configurator for this board).
Recommends this product? No
goatpath
3
Apr 28, 2020
checkVerified Buyer
Super fun kit
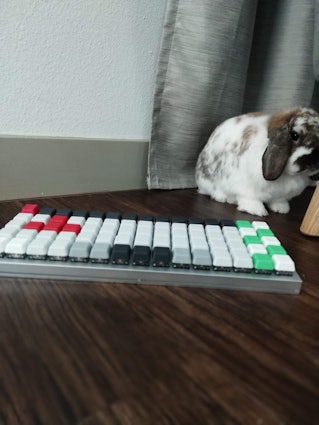
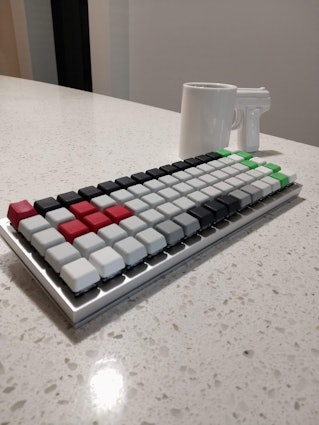
Overall I like this product a lot. It feels like putting legos together, and is satisfying in terms of tolerance/fit. I put G20 keycaps on mine because it is a glorified game pad for my use, but this layout could possibly be good for typing, too. I won't be trying that lol. The learning curve is EXTREMELY steep.
I cringe at $400 keyboards, not gonna lie. Like what is it for? I ordered this because I had never tried an ortholinear layout, and I liked the aesthetic, and I figured with keys that are all the same size, an no stabilizers present, there wouldn't be much rattle. Plus, the arcylic panel sandwiched between two aluminum plates helps damp vibration, too. So I was expecting 'high build quality' and I took my time putting it together. Very satisfying to load all the switches into the PCB, just bending the fuck out of pins left and right lol. Doesn't matter, they all work. High quality stuff from Gateron, I'm impressed. The Gateron Blacks I went with are smooth and linear and don't rattle. Most of them seem to have the same level of snugness fitting into the plate. The one part of this (and every keyboard, even a RAMA a friend of mine has) is the plugging/unplugging of the USB-C cable. It's like floating in it's little cave - needs a gasket around it, and I will be making one from silicone or something similar in the future. I plan on disconnecting the cable once or twice a day though, maybe that's not you.
Notes on programming: I didn't know how to use QMK toolkit, and it was a bitch to learn on the fly. I wish tutorials just said 'don't touch the 'Load' button' but I clicked that fucker like 15 times in a row and changed the .hex file I was flashing to some default.
Program a RESET key to your 1-layer, accessible from the 0-layer. If you don't, you will have to disassemble to access the reset button on the back of the PCB (not a huge deal guys, it's 6 screws lol). Still, better to get this one right the first time.
Program ALL the lighting effect buttons on a single layer, whichever one you want, and figure out from there which buttons you want to keep. Most of the buttons don't do anything, and the LED effects are pretty baller so you should check them all out and have access to them.


Recommends this product? Yes
Showing 12 of 30
Recent Activity
